Printfriendly

Showing posts with label Appetizers. Show all posts

Monday, February 24, 2014

Spicy Beef Empanadas and Chimichurri

On Sunday we spent the day hunkered down by the fire, staying warm and deciding not to go anywhere. The Olympic closing ceremonies were on, heavy snow was blowing in drifts outside, the roads were bad, so why not just stay home?  Even though I had spent most of Saturday cooking, there were a few things left that I could fiddle around with, right? Turns out hot, flaky, spicy meat filled empanadas slathered with a spicy chimichurri sauce is JUST the thing to make when it’s cold and snowy outside.

These “little pockets of happiness," as Kevin called them, are a little fiddly. There’s rolling out pastry and shaping involved, but it’s nothing you can’t handle. Plus it’s completely worth it when you pull a pan of these out of the oven and your teenager is in the kitchen, pulling them off the hot pan and drenching them with sauce before stuffing them in his mouth. I may have joined him, even.

 Enjoy!

empanadas chimichurri


Servings: about 24 empanadas

Time to prepare: 45 minutes

Time to cook: 30 minutes

Ingredients:

two boxes of puff pastry (I used Tenderflake)
1 onion, finely chopped
3 garlic cloves, minced
pinch cumin
pinch cinnamon
1/2 tsp paprika
10 oz ground beef
1/4 cup chopped green olives
1 tsp oregano
1/2 tsp dried chile flakes
pinch sugar
2 hard boiled eggs peeled and chopped finely
1 large egg, beaten

Directions:

In a large frypan, sauté the onions and garlic on medium low in a little olive oil until they are softened, but not browned. Sprinkle in the cumin, cinnamon, and paprika, stirring until fragrant. Add the ground beef, breaking it up and stirring around. Season with some salt and pepper.

Once the beef is browned, mix in the olives, oregano, chili flakes, and sugar. Take the pan off the heat and mix in the hard boiled eggs, then leave the whole thing to cool.

Roll out the puff pastry on a well floured piece of parchment paper on your counter, to about 1/8 inch thickness. Cut the pastry carefully into 4 inch circles. If you don’t have a 4 inch cutter; that’s okay-Paper Chef parchment’s logo (right on the parchment) is exactly 4 inches in diameter! I cut it out and then just used that to measure. I transfer the dough to a cutting board to protect my counter, which is why I roll it out on parchment or even waxed paper. Much easier to move!

Place the dough circles on a plate, cover it with plastic wrap, and then put in the fridge to chill.

making empanadas


Arrange your workspace so that you can assemble the empanadas. You’ll need a small bowl with a beaten egg and a pastry brush, a rimmed baking sheet to bake the empanadas on. Arrange 2-3 dough circles on the counter in front of you and measure out 1 tbsp filling into the center of each, leaving 1/4 inch border of dough.

beef empanada


Brush 1/2 the rim of the dough circle with egg and then fold over, half moon style, pinching the edges together to make them stick.

empanadas


Arrange the empanadas on the baking sheet as you assemble them. Using a skewer, poke a hold in the tops of each to allow steam to escape. Put the whole pan in the fridge for 20 minutes to chill.

Pre-heat the oven to 400F.

Brush the empanadas with beaten egg, and then bake for about 10-15 minutes. They will puff and brown, but you don't want them to burn so keep a close eye on them. While the empanadas are cooking, make chimichurri sauce to slather on them while you eat.

empanadas with chimichurri

Chimichurri Sauce

Ingredients:

Bunch of fresh Italian parsley (leaves only)
3 garlic cloves
1 Tbsp chopped fresh oregano
1 tsp dried chili flakes
1 tbsp red wine vinegar
1 tbsp lemon juice
5 tbsp olive oil
salt and pepper to taste

Directions: 

Roughly chop up the parsley and garlic in your food processor using the pulse setting a few times. Add the remaining ingredients and process to combine. Serve on the side when you set out the empanadas so people can spoon the sauce over.

Adapted from Gordon Ramsay


Read More

Wednesday, September 18, 2013

Avocado and Sweet Pea Guacamole

avocado pea guacamole


I love guacamole and have a recipe for some that is super addictive, but the other day I wanted to try something a little different for school lunch. Something maybe a little less fatty, but still tasty with crackers. At work I'm often eating on the go so dip and crackers are a perfect snack to carry.

Awhile ago I picked up some Lesley Stowe Rainforest Crisps and found this recipe on the bottom of the package. Intrigued, I decided to use up a stray avocado on the counter. I wasn't really sure about it until the other day when in the staff room at work, I downed the entire thing with crackers in only a few minutes and sat there, contemplating whether I should lick the container. Even my co-workers noticed and giggled.

This may be a really great way to get your kids to eat a healthy dip if they aren't sure of avocados. The pea flavour is tempered a little, and there's some lime in there just to make it interesting. I love the Lesley Stowe crackers, but try it with whatever you like.

1 avocado, peeled, pitted, and chunked
2 tbsp freshly squeezed lime juice
1/2 clove garlic, minced
8 oz sweet green peas, thawed
1/2 tsp sea salt
dash of hot sauce

Blend up the avocado, garlic, and lime juice in a food processor. Add in the peas, salt, some fresh cracked pepper, and hot sauce to taste. Blend some more until smooth. Taste and correct the salt, pepper, and hot sauce to your liking. Now just gobble up with crackers!

Store in a covered, air tight container in the fridge. The top will go a darker green and trust me, it will look funky in the morning but if you give it a good stir, it will all look gorgeous green again. Try putting some cling film directly on the surface of the dip-maybe that will help.

Makes about 2 cups

Looking for more snack ideas? You may like these dips and dippers!

Apple, Ham and Cheese Dippers

Quick Veggie Dip 

Garlic Tahini Dip

Roasted Sweet Potato Hummus

Carrot Hummus


Read More

Thursday, August 15, 2013

Tomato Basil Ricotta Crostini

tomato ricotta crostini


Remember last week when I made ricotta cheese? That night for dinner I had to use it up, so I made these fantastic tomato ricotta crostinis. You will find loads of fresh tomatoes right now at the Farmer's markets, and fresh basil is easy to find at the market this time of year. Take advantage of seasonal produce and make these for lunch or serve with soup and salad for a light dinner.

You don't have to make your own ricotta cheese, but I do highly recommend it. The homemade ricotta was much creamier and rich that any store bought version I've found. The measurements are pretty approximate, because I don't think it's really difficult to make this. Just use the recipe as a guide and you can do it!

Ingredients:

French bread (for a sandwich) or baguette (for appetizers)
about 2 medium sized tomatoes, seeded and sliced
1/2  green onion, chopped finely
fresh cracked pepper
clove of garlic, sliced in half
1/2 cup ricotta
handful of chopped basil
olive oil

Slice the baguette or French bread into about 1/4 - 1/2 inch thick pieces on a diagonal.   The size that you slice them into doesn't matter really, you can slice them smaller if you are making appetizers or larger if you are serving them for lunch. Lightly brush one side with olive oil and toast until golden. When you remove them from the broiler, rub the toasted side with the garlic clove, cut side down.

In a small bowl, stir the ricotta with the green onion, a pinch of salt, and some cracked pepper. Spread it over the bread. Top with tomato slices, drizzle with a small amount of olive oil, and sprinkle with basil and more cracked pepper and salt, if you wish.

Makes 4 sandwich sized crostini

Read More

Thursday, July 18, 2013

Clean out the Fridge: Veggie Salad Rolls

Salad rolls can be a great snack on a hot day, and if you are looking for a project to make with the kids this can be a lot of fun. You can swap the fillings around all you want and include leftover grilled chicken or shrimp, and leave out the herbs if the kids don't like them. Change up the veggies so that you can use up anything leftover in your fridge.  I have made these following the recipe exactly, and by swapping out some of the veggies and using shredded purple cabbage, sweet bell peppers, basil, avocado, and finely chopped celery with the carrots and green onion.

Along with a great dip you can either serve these for lunch, snacks, or as an appetizer to a great meal. Either way they don't require an oven so you can keep your cool! I stored them in an airtight container in the fridge with a moist paper towel over top.

What are rice paper wrappers, you ask? Rice paper for salad rolls are typically sold in the ethnic or Asian area of your grocery store, in plastic wheel shaped containers, like pictured below.

rice paper


They are hard, round things that you have to soak briefly in warm water to soften so you can roll them. Rice paper is kind of thin so it takes a little practice to soak, fill, and roll it without tearing, but I know you can do it!

salad rolls and peanut sauce 2


Ingredients:

125 g rice vermicelli noodles
1 cup grated carrot
1 cup bean sprouts, lightly chopped
1/2 cup long English cucumber, julienned
1/2 cup chopped green onions
1/2 cup mint, finely chopped
1/2 cup cilantro, finely chopped
2 tsp sesame oil
14 six inch rice paper wrappers

...and a batch of peanut sauce

Directions:

Put the vermicelli noodles in a large bowl, then pour boiling water over top until they are covered. Put a pan or something on top to cover and let them soak until tender, or about 4 minutes. Drain and rinse with cold water.

Let the noodles sit and drain for about 5-10 minutes. You want to get all the water out of them or when you add the dressing, it will get watered down and runny.

Chop up the noodles a bit so they aren't in such long strands. Mix them in a bowl with the carrots, cucumber, green onion, mint, cilantro, and sesame oil, then toss with enough of the peanut sauce to coat (about 1/3 of the batch).  Set aside.

soaking


Pour about 2 inches of hot water into a pie plate and completely submerge a rice paper wrapper. Let it sit for about 10-15 seconds until it's softened. Remove from the water, let the excess drip off, and carefully lay it on the counter in front of you.

rice paper1

It's hard to get it perfectly flat on the counter. Don't worry about that.

rice paper2


Mound about 1/4-1/3 cup of the noodle filling near the edge closest to you, in a log shape. I took the photo on an angle, but you would have this turned and the noodles/avocado facing you.

rice paper3


Fold the sides in and, rolling away from yourself, tightly roll that baby up.

rice paper 4


Set the finished salad roll on a plate that is covered with a damp paper towel. Continue with the rest of the rice paper wrappers. As the water cools in the pie plate, you will have to top it up to make it warm again.

Serve on a plate garnished with chopped fresh chiles, green onion, and peanuts with the peanut sauce on the side to dip. These don't keep well, you need to eat them the same day.

Makes about 14 rolls

Adapted from Whitewater Cooks With Friends

Read More

Saturday, July 6, 2013

Kid Friendly Turkey Spinach Sliders

Turkey Spinach Sliders


Sometimes, all you need is a little bit of burger. Or three. Sliders can be a lot of fun as an appetizer, something for small kids, or if you want to make a few different kinds for people to sample all sorts of flavors at a party. These sliders are, as my 17 year old put it, "a great way to introduce little kids to spinach because they are so good you don't even realize you're eating spinach."

At first when I began making them I was a little concerned that the spinach seemed to completely outweigh the amount of turkey that was in the bowl. Seriously? This thing is all spinach? In reality, it's not so much -- the patties come together beautifully and have a lot of flavor. Just make sure to chop up the spinach well so you don't have any large pieces.

My family loved these things-John ate them cold without the buns, Kevin had three, and to make dinner easy I simply set out a cutting board with various toppings all laid out on it; tomatoes, red onion, a jar of mayo, mustard, the buns, etc. and let everyone top their own. With a really great salad, they turned out to be a fairly easy and mess free dinner.

Ingredients:

4 cups fresh spinach, chopped (about 1/2 bunch)
4 green onion, thinly sliced
2 garlic cloves, minced
1 lb ground turkey
3/4 tsp ground cumin
3 tbsp olive oil
12 slide buns or small dinner rolls

mayonnaise, sliced red onions, pickles,

Directions:

In a large bowl, combine the spinach, green onion, garlic, turkey, cumin, some fresh cracked pepper, and a bit of salt. Mix well with your hands. This is going to seem like you have a pile of spinach and no turkey, but trust me on this, it will work.  Squish it all together until it’s well mixed.

Shape the spinach and meat mixture into 12 small patties.

Heat the oil in a non stick skillet over medium heat and fry up the patties in batches until they are browned and cooked through. Set them out on the counter with split buns and the toppings, and allow people to create their own sliders.

Adapted from Bon Appetit

Makes 12 sliders, or 4 servings of three each

Read More

Monday, April 1, 2013

Baked Egg Rolls

Baked Egg Rolls


This recipe is a great alternative to deep fried egg rolls. They are tasty, and if you don't happen to eat them in one fell swoop, they do freeze well too. I just pop 'em in a 350 F oven for a few minutes right from the freezer. Make sure you've got plum sauce for dipping. Kevin commented that he found these really fun to make and plans to take some to school in his lunch tomorrow.

Adapted from Canadian Living

1 lb (500 g) lean ground pork
3 green onions, sliced
2 cloves garlic, minced
1 carrot, grated
1/2 cup water chestnuts, chopped
1/3 cup bamboo shoots, chopped
2 tbsp soy sauce
1 tbsp corn starch
1 tsp sesame oil
1/2 tsp pepper
12 large egg roll wrappers (fresh)
1 tsp vegetable oil

Saute pork in a skillet until no longer pink. Add the onions, garlic, carrot, water chestnuts, and bamboo shoots. Cook until pork is cooked through and veggies are soft. Remove from heat and set aside to cool for about 3 minutes.

Meanwhile, in a small bowl combine the soy sauce, 1 tbsp water, cornstarch, sesame oil, and pepper. Whisk with a fork. Once the pork mixture has cooled a little, pour the soy sauce mixture over top and mix gently to coat the meat.

Open your package of egg roll wrappers and peel one off. Cover exposed wrappers with a damp paper towel. Lay the wrapper on the counter in front of you and brush the edges with water. Spoon about 3 tbsp filling in the middle of the wrapper. I know there is none in this picture, but let's pretend, okay?

Fold the right and left sides in towards the middle like a book. Again, pretend there is filling! It would be right in the middle there, hiding under the sides that are folded over top.Then, take the wrapper side that is closest to you and tuck over the filling, continuing to roll away from yourself. It's like rolling up a burrito!

Place finished egg rolls seam side down on a cookie sheet and cover with a damp paper towel. When you have finished using all the filling, brush the rolls with vegetable oil and bake in a 375 F oven for about 18 minutes or until golden and crispy.

Makes about 12-15 rolls
Read More

Monday, April 2, 2012

Hug-worthy Guacamole


Guacamole


The first time I ever had really great guacamole, I was about 15 years old.  My family was visiting my uncle Bill in California at his almond ranch.  California was far different than I expected-the hot dry weather of Chico, lizards, and the abundance of fruit blew me away.  One day for a snack, Uncle Bob whipped up a batch of guacamole with the sweetest, most delicious avocados I'd ever eaten. I still remember that day-sun kissed from the morning in the pool, I sat wrapped in a towel by the breeze of the air conditioner, watching him in the kitchen.

"There, now THAT is guacamole," he set a bowl in front of me and pushed a bag of chips my way.  I think I likely ate half the bowl.

Since then, I've been to California multiple times, and I always sigh with happiness when we roll over the pass by Mount Shasta and into Redding.  Of all the states we have visited, California is one of my favorites-the people, the scenery, and of course the food, never fail to make an impression.  Last summer while I traveled with the girls to Blogher in San Diego, we picked up guacamole kits in Trader Joes and there I'd be, late at night, whipping up guacamole in our hotel room.  We ate every last bite.  It wasn't quite my Uncle Bill's, but it was still delicious.

This afternoon, looking for something to nosh on, I wanted a bit of summer and reached for the avocados.  Kevin came bounding into the kitchen, took one look at what I was doing, and threw his arms around me in wild abandon.

"I LOVE you.  I LOVE guacamole."

On rainy cool days when I'm dreaming of hot sunny places and California, I feel that way too.

2 large avocados
1/4 cup red onion, finely chopped
1/4 cup seeded and diced tomato
2 limes
1 jalapeno pepper, seeded and minced (optional)
3 Tbsp finely chopped cilantro (optional)
salt and pepper to taste

Mash up the avocados with a fork.  I like to have it a little chunky, so I do this roughly and don't worry too much about getting it smooth.  Stir in the other ingredients, before zesting 1 of the limes into the bowl, then cutting the limes in 1/2 and squeezing the juice over top.  Mix everything together well.

Serve with tortilla chips.

Makes about 1 1/2 cups
Read More

Tuesday, March 27, 2012

Turkey Meatballs with Scallions and Soy Ginger Glaze


Turkey Meatballs with Balsamic Glaze, turkey meatballs


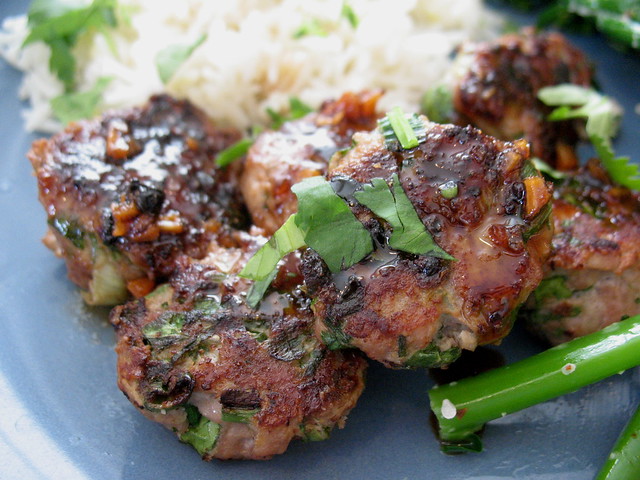
Meatballs are a great party food, but we also like them for dinner.  Sometimes when you make them with turkey they can be a bit dry and tasteless, but these ones are full of flavour.  We had them with coconut rice and brocollini, but you can also try serving them at a party with the glaze on the side.  If you are feeling adventurous, try slipping them into tiny bins and use the glaze as a sauce, while you add a bit of thinly sliced veggies.  There is quite a bit of sauce in this recipe, and I'd likely double the amount of meatballs while leaving the sauce as it is.

Adapted from Smitten Kitchen

1/2 cup brown sugar
1/2 cup water
1/2 cup reduced sodium soy sauce
1/2 cup mirin (Japanese rice wine, found in Asian or Japanese markets)
3 tbsp peeled, minced fresh ginger
1 tsp ground coriander
4 black peppercorns

In a medium sized pot, combine the water and sugar over medium high heat until the sugar melts.  Stir in the soy sauce, mirin, ginger, coriander, and peppercorns. Bring the mixture to a boil, then turn down and allow it to simmer for about 30-45 minutes until the mixture is reduced by half and syrup-like.  While it bubbles on the stove, make your meatballs!

Meatballs

1 lb ground turkey
4-6 green onions, chopped finely
1/2 cup coriander, chopped finely ( you could substitute flat leaf parsley if you like)
1 large egg
2 tbsp toasted sesame oil (regular is fine)
2 tbsp soy sauce
fresh cracked black pepper

Mix all the ingredients together in a large bowl.  Put a skillet over medium high heat and add a little oil before measuring out the mixture in tablespoon sized portions.  Roll into balls-although the mixture is fairly wet, so it's a bit hard to do.  Don't worry about getting them perfect.  Brown in a skillet, being careful not to have too many in the pan at once. They should take about 8 minutes to brown and cook through.

When you serve the meatballs, drizzle cooled glaze over top.  You can serve these with rice and a vegetable for dinner, or as an appetizer if you wish.

Serves 4
Read More

Wednesday, January 4, 2012

Sundried Tomato and Feta Hand Pies


Hand Pie, Sundried Tomatoes, Olives, Feta, pie, appetizer
At first I wasn't sure about the lentils and olives, but they are mighty tasty!


These flaky little pockets stuffed with tasty feta, sundried tomatoes, olives, and lentils make a great snack or appetizer. I admit, at first I wasn't sure about the filling but in the pie it totally works.   You could even tuck them into a lunch box for the kids!  Don’t let pastry scare you off-I’m still learning how to work with pastry and found them surprisingly easy. The thing is, they are so good that you will have a very hard time not scarfing them down before they hit the lunch box!

Adapted from Spill the Beans

2 ½ cups flour
½ tsp sugar
½ tsp salt
¾ cup cold butter
5 tbsp ice water, plus more as required

Filling:

¼ cup dry green lentils (or ¾ cup canned lentils, drained and rinsed)
¼ cup kalamata olives (about 8-10), chopped finely
¼ cup sundried tomatoes in oil, chopped finely
¼ cup feta cheese, crumbled finely
1 Tbsp Italian parsley, chopped finely
freshly cracked pepper
1 egg, lightly beaten with 1 tsp water

In a bowl, stir together the flour, sugar, and salt with a fork.  Using the coarse side of a grater, grate the butter into the bowl.  Cut in the butter with a pastry cutter until the mixture resembles crumbs.  Add the water tablespoon by tablespoon, stirring with a fork until it begins to clump together, adding as little water as you have to.

Turn the dough out onto the counter and bring it together into two disks.  Handle the dough as little as possible.  Too much handling makes pastry tough, and you don’t want the warmth of your hands to melt the butter in your dough either.  Cover the disks with plastic wrap and chill in the fridge for a few hours or overnight.

Make the filling:

Pre-heat the oven to 400 F.

In a small saucepan, cook the lentils in 1 ¼ cups of water with the lid on for about 30 minutes.  Take them off the heat and allow to cool.  In a bowl, combine the olives, sundried tomatoes, lentils, feta, parsley, and pepper.

Roll the dough out on a floured counter to less that 1/8th of an inch thick.  Cut into 4 inch round circles-fill each with a scant 1 tbsp of filling, then crimp closed with a fork.  Re-roll the scraps of pastry only once before re-cutting out.  Place the filled pockets 1 inch apart on a baking sheet.  Brush with the beaten egg and cut three tiny slits in the top before baking for about 10-14 minutes until puffed and golden brown.

If you have leftovers, these are easily re-heated.  Just pop them into a 350 F oven for a few minutes until hot, and serve.

Makes 12-15 pies


Flaky Little Handpies
After taking this photo I ate FOUR.  Yes, four. 
Read More

Sunday, October 30, 2011

Sweet Potato Oven Fries with Spicy Chipolte Mayo

sweet potato fries


Roasted sweet potatoes are one of my favorite side dishes and make a regular appearance in my home. Treated just like roast potatoes, the edges crisp up and a sprinkle of spicy flavor make them delectable. I like to use Montreal Steak Spice because I love the peppery flavor, but feel free to experiment with whatever spice blend you like.  Clubhouse also makes a great vegetable spice blend-although I haven't been able to find one without salt.  In general I choose the no salt varieties because while I love spice, I don't necessarily love a lot of salt.  Recently,  Kevin suggested we come up with a spicy chipolte mayo that shot these bites of deliciousness clear over the top and has left us trying, unsuccessfully, to stop from eating an entire plate.

Of course I tweeted that information and within seconds, it felt like my entire stream was asking for photos, the recipe, anything that would give them a whiff of what we were eating.  Of course, I had to make it again just to be sure it was...um...perfect enough for you.

Right.  That's my story, anyway.  

Before I go any further, just to keep you all in the loop here-what is the difference between a yam and a sweet potato?  Some people say that they are interchangeable, but what is labeled 'yams' here at the store are far different than 'sweet potatoes' in texture and taste.  I LOVE yams, and hate sweet potatoes.  So which ones am I talking about?

They are BOTH sweet potatoes.  I know, I know.  You're scratching your head and wondering what the hell I'm talking about. 

Believe it or not, there are two different kinds of sweet potatoes-one is the tougher, more starchy and whiter fleshed kind that we here in North America call 'sweet potatoes', and the smaller, more orange colored, moister textured variety that we call 'yams'.  Both are sweet potatoes.  I prefer the dark orange variety for the moister interior and flavor, and that is what I used in this recipe.   

Still not sure? Check out this article by Bon Appetit, with a great photo of a true yam.

Sweet Potato Oven 'Fries'

Serves 2 people 

1 1/2 lbs orange sweet potatoes (often called yams at the store)
olive oil
Montreal Steak Spice (without salt)

Spicy Chipolte Mayo

1/3 cup mayonnaise
2 Tbsp sour cream
2-3 tsp chipolte puree (*see note below), depending on how spicy you like it.  Try less and if you want it hotter, add more.
1/2 lemon, freshly squeezed

Pre-heat oven to 375 F and line a rimmed baking sheet with Paper Chef parchment paper.  I really love using the parchment here because I have some really nice rimmed baking sheets, and the last thing I want is sticky sweet potato stuff all over them that I may have to scrape off and ruin the finish. 

Peel and slice sweet potatoes into even sized chunks, or stick shapes.  I usually do mine into chunks, but I thought I'd try more for a fry effect for photos.  The point is, you want them to be uniform sized as much as possible so that they will cook evenly.

Toss the sweet potato chunks with a glug of olive oil-enough to coat them, and then sprinkle with some steak spice.  You can use whatever spice blend you wish, but I like mine peppery so this one works for me.  I  prefer the kind without salt because otherwise I find my fries too salty.   Toss so everything is nicely coated.

Turn the bowl out onto the parchment, spreading the sweet potato fries out to give them some room.  Bake for about 20-25 minutes until lightly browned and cooked through.

While the fries are baking, stir together all the dip ingredients.  It may seem a bit hot but remember that when you are dipping the sweet potatoes in it, the sweetness from the potatoes will cut the heat somewhat.  Cover and put the dip in the fridge until the fries are ready, then serve immediately.

*Chipolte puree is easily made by buying a can of chipoltes in abodo sauce, then pureeing it in a food processor.  Spoon into an ice cube tray and freeze, so you can thaw a cube and use it to flavor all sorts of dishes.


Photobucket


This post is sponsored by Paper Chef, who generously sponsored my trip to Blissdom Canada!  Make sure to go check out their site for other fantastic recipes, videos, tips and trips on how to cook with parchment paper products.   I use their products all the time in my kitchen and find them invaluable for clean up and just making my cooking/baking life a whole lot easier!
Read More

Tuesday, October 25, 2011

Maple Glazed Turkey Meatballs

turkey meatballs


I love these meatballs. A sweet glaze and herbs reminiscent of Thanksgiving stuffing, they would make a really tasty appetizer at a party or sandwiched in a tiny bun with some lettuce and tomato. You could even serve them with creamy mashed potatoes and a salad for a quick family dinner.

I know the picture makes them look like they are uncooked, but as I have found out, meat is really hard to photograph! Trust me, they were cooked.  And they were delicious.

My favorite way to cook meatballs is in the oven, on a cookie sheet lined with parchment paper.  Paper Chef's parchment was the best here-it really helped to keep my pans clean and almost all the mess just went right into the garbage when it was time to do the dishes!  Also, baking meatballs keeps them a little healthier and lets you forget about them for a bit so you can go do something else.

1 small leek
1 tbsp butter
2 tsp fresh thyme, chopped
2 tsp fresh sage, chopped
½ tsp salt
½ tsp fresh cracked pepper
1 lb ground turkey
¾ cup coarse breadcrumbs
2 Tbsp milk
1 egg, lightly beaten

Glaze:
¼ cup maple syrup
1 lemon
2 Tbsp butter

Pre-heat oven to 400 F and line a baking sheet with parchment paper.

Wash leeks and sliced into thin rounds. Over medium heat, sauté the leeks in the butter until softened. Let cool slightly before transferring to a medium sized bowl. Add all other ingredients, then gently mix with your hands.

Scoop out mixture into tbsp sized portions and gently shape into balls. Set on baking sheet and bake for about 15 minutes. Meanwhile, in a small saucepan over medium heat, bring maple syrup, butter, and lemon zest to a simmer, stirring. The mixture should thicken slightly after about 3-5 minutes. Brush over the meatballs. Continue to bake the meatballs another 15-20 minutes, brushing occasionally with more glaze.The meatballs will be done when the internal temperature is 170 F.

Makes 4-5 main dish servings

Photobucket


This post is sponsored by Paper Chef, who helped send me to Blissdom Canada this month! I loved their products so much I suggested we team up and do a little cooking together. I love using parchment to protect my favorite cookie sheets while I'm whipping up these meatballs, as it keeps the mess to a minimum.  For more recipes, make sure to drop by their site-I especially love the sweet and spicy nuts. Yum!
Read More

Tuesday, December 28, 2010

Veggie Squares

Veggie Squares


A biscuit like crust topped with cream cheese and then layers of veggies is not only an easy, but tasty appetizer to take to parties. I like them even just for a snack!

2 cans of Pillsbury Crescent Rolls
1 8oz package of cream cheese
1 tbsp of horseradish
1 package of dry Knorr veggie soup mix
1/2 cup of margarine
1/2 cup of chopped broccoli (very small)
1/2 cup chopped green onion
1/2 cup finely chopped, seeded Roma tomatoes
1/2 cup finely chopped mushrooms
sliced black olives
1/2 cup finely chopped sweet red pepper.

Unroll dough onto a cookie sheet. Seal the perforations together and press pieces to cover the bottom. Prick with a fork and bake at 350 F for about 8-10 minutes (or until golden brown, watch it carefully). Remove from oven and cool. In a bowl combine the cream cheese, horseradish, soup mix, and margarine. Spread over biscuit base. Top with veggies and press gently into filling. Cover with Saran wrap and chill until ready to cut into pieces and serve.

Best served the day it is made, as the crust goes a bit soggy when it sits.
Read More

Monday, November 22, 2010

Cheese Straws

Cheese Straws
Awhile ago I stepped into the Cooking Class at school, only to be greeted with the deliciously cheesy smell of these straws baking away in the ovens. You see, I love cheese. It's my favorite snack. Cheddar, havarti, blue, brie, Parmesan, you name it, I love it-which is why these babies are a perfect appetizer. Served along side veggies, with some hummus or a great dip, they are a great finger food to nibble on. They are also so incredibly easy, you'll have a batch or two babies baked up in no time.

Adapted from Caren McSherry's More Than Salt and Pepper
1 cup extra sharp cheddar cheese, grated
1 cup flour
1 tsp dry mustard
1/4 tsp smoked paprika
1 tbsp melted butter
1/3 cup milk
sea salt
pepper

Pre-heat your oven to 450 F.

In a bowl, mix together the cheese, flour, mustard, paprika, melted butter, and milk to form a soft dough. My dough was a little dry so I added a little extra milk. Form the dough into a flat disk, wrap in cling film, and put in the fridge for about 30 minutes.

Roll out the dough on a floured board to about 1/4 inch thick, in a rectangle about 20 cm long. Using a pizza cutter, slice the dough into strips 1 cm thick and 20 cm long. Sprinkle with sea salt and pepper.

Transfer the strips to a parchment paper lined baking sheet and twist them gently. Bake for about 5 minutes, watching carefully-they bake quickly! Remove from the oven. Allow to cool completely on the baking sheet before transferring to a baking rack.

Makes about 20 cheese straws
Read More

Monday, November 1, 2010

Loaded Party Nachos

Loaded Nachos

One thing I'll never understand is how anyone eats nachos with that nasty fake cheese sauce. I mean, seriously? How on Earth can anyone stomach that stuff? For Halloween, I created these deliciously cheesy dinner nachos as a treat for Jake and I to nibble on. Paired up with Spanish Rice and Andrea's guacamole, they were little bits of crunchy, salty, spicy heaven. Loads of veggies, spicy meat and cheese make them go from junk food to almost healthy!

1 large bag of nacho chips
1 onion, chopped
1 lb lean ground beef
1 (19 oz) can black beans, drained and rinsed
1 1/2 tsp chili powder
1 1/2 tsp cumin
1 large sweet red pepper, chopped
1 large tomato, seeded and chopped
about 2-3 cups of aged cheddar cheese (more or less, if you need)
chopped fresh cilantro

Pre-heat oven to 350 F.

Spread the tortilla chips out on a rimmed cookie sheet, sprinkle with cheese, and set aside.

In a fry pan, saute the ground beef with onion until cooked through and no longer pink. Add the chili powder, cumin, salt, and pepper, stirring and tasting to correct for seasonings. Stir in the drained black beans and set aside to cool.

Set the cookie sheet with the tortilla chips in the oven for a few minutes, watching carefully, until the cheese is melted and bubbly. Remove from the oven. Sprinkle with the cooled beef/bean mixture, diced tomato, diced peppers, and cilantro. You may not need all the beef/bean mixture, so you can put it in the freezer for another day. Or, just load it all up-whatever works for you!

Serve with fresh guacamole, salsa, and Greek yogurt or sour cream to greedily dip into, licking the salty goodness off your fingers.

Serves 4-5.
Read More

Sunday, March 7, 2010

Prosciutto Arugula Toasts


I love watching Food Network. One day, right before dinner, Jake decided to watch some Italian themed show and there I was, drooling, ready to lick the screen. I don't remember the name of the show but I took one of the ideas and adapted it for here.

The premise is so easy-crusty Italian bread, topped with prosciutto and then arugula dressed with a bit of olive oil and lemon, topped with shavings of Parmesan. Jake and I snarfed these down, because they were SO good. Quick, too! The original recipe called for pizza dough, which you bake in serving sized rounds like a wrap. I used some Italian bread instead.

To make your own at home you will need...

-slices of Italian bread (about 1/2 inch thick) we used two each, since they weren't that huge
-prosciutto (125 grams served Jake and I with a bit left over)
-tub of arugula
-lemon
-olive oil
-salt and pepper to taste
-block of Parmesan cheese

Toast the bread. DON'T butter it, just toast it dry. Why? The fat from the proscuitto melts and adds fat to the sandwich anyway, so you don't really need to add more. While the bread is warm, layer on some proscuitto. Set aside.

This is where you get to eyeball it a bit. I took a couple handfuls of arugula and drizzled a small amount (maybe a few teaspoons) of olive oil over it, then cut the lemon in half and squeezed in the juice. Toss. Add some salt and pepper to taste.

Mound the arugula over the prosciutto. Then get out your block of Parmesan and shave bits over top. Serve two toasts per person, and something like oven fries or some veggies and dip would make a nice accompaniment.

Delicious!
Read More

Saturday, April 18, 2009

Crispy Parmesan Chicken Fingers

Sometimes baked chicken fingers come out with very little crunch. The panko, cheese, and then butter drizzled over top of these bake these fingers up into a very satisfying, if not a little fattening, crunch. I love these chicken fingers, and they are especially good cold in a lunchbox. They are fairly quick to make but make sure you don't line the pan with parchment paper. You really want these things to crisp up, and the parchment doesn't allow them to do that. Instead you'll end up with soggy bottoms.

Adapted from Canadian Living

4 boneless skinless chicken breast halves
2 eggs
1 cup finely grated Parmesan cheese (the real stuff, not powdery stuff)
1 cup Panko (Japanese bread crumbs)
4 tsp chopped fresh oregano (or 2 tsp dried)
1 tsp salt (I skipped the salt-the cheese was salty enough)
1/2 tsp pepper
1/2 tsp paprika
1/4 cup butter, melted

Slice the chicken breasts into "fingers". Usually I remove the chicken tender part, then slice the breast on the diagonal into 5 pieces.

In a bowl, combine the panko, cheese, oregano, salt, pepper, and paprika.
In a separate bowl, crack and beat the eggs.

Working assembly-line style, dip the pieces of chicken into egg. Let the excess drip off, and then roll in the panko/cheese mixture, pressing to make the crumbs adhere. Transfer to baking sheet. Continue until all the chicken is coated. Drizzle with the melted butter.


Bake the chicken in a 425 F oven for about 15 minutes, or until golden, crispy, and cooked through. What I love about these is that You can make them ahead of time and freeze them, raw, for up to two weeks. Bake straight from frozen and add 5 minutes to the cooking time.

They were delicious! Very crunchy and cheesy-almost a bit too cheesy. Next time I'd reduce the cheese to 3/4 cup and add 1/4 cup more Panko crumbs.

Makes 4 servings.


Honey Mustard sauce


1/3 cup light mayonnaise
2 tbsp dijon mustard
1 tbsp liquid honey


Stir together in a bowl and serve with raw veggies and the chicken fingers.

Read More

Tuesday, December 30, 2008

Toast in the New Year With an Appy Spread Menu

Every New Year's Eve, we have an Appy Spread dinner. It's nothing fancy really, just a bunch of things that I put out and a we nibble on for the evening.

This year's menu:

-tiny cocktail sausages (not sure what it is about these, but Hubs and Jake LOVE them)
-sliced cheeses
-Snack'ums pickles
-deviled eggs
-Vegetable Thins crackers and Triscuits
-smoked oysters
-orange and thyme prawns (I made the dip that goes with them and served them with toothpicks)
-spanakopita triangles (ready made, frozen from a box-they're delicious!)
-veggie plate
-phyllo cups (follow that link for tons of recipes) filled with spicy mango and chicken salad...
Basically I made the chicken with this marinade, grilled it on skewers, then made of variation of this filling. I omitted the lettuce, diced the chicken small and mixed it with some diced red pepper, green onion, and some mango. I then tossed it with a bit of Miracle whip, a squirt of lime juice, some lime zest and a bit of sugar, and filled the shells. Yummy!

-various Christmas goodies-butter tarts, sugar cookies, a bought Christmas cake

-coffee, assorted teas, some sparkling apple juice and ginger ale to toast the new year with, and an assortment of movies (Prince Caspian, Hancock, Wanted, and The X files)

We will hang out, nosh on goodies, and spend the evening curled up by the fireplace under warm blankets together.

There's also a How To on making New Year's crackers at Notes From the Cookie Jar.

What are you doing for New Years?
Read More

Wednesday, July 11, 2007

Bruschetta

Bruschetta


Summer is a time for great tomatoes and basil...and when I think of tomatoes and basil, I think of bruschetta. I often serve it up with an assortment of salads and other appies for a nice light dinner on the deck.

Adapted from Canadian Living

1 french baguette
olive oil
garlic clove (split in 1/2)

Cut the baguette diagonally into 12 slices. Brush each slice lightly with olive oil . Under the broiler, toast the slices so they are golden brown, turning once. Remove from oven and rub each slice with the garlic clove.

In a bowl, combine:
1 1/4 cups seeded and chopped Roma tomatoes (they are meatier)
2 tsp olive oil
1/4 tsp each salt and pepper
1 clove garlic, minced
1 tbsp minced fresh basil
1 tbsp fresh Parmesan cheese (not the imitation-it pays to get fresh here)

Mound about 1 tbsp of topping onto each toast and serve.

Makes 12

**personally I find that 1 long baguette is enough to make 24, thereby doubling the topping. I don't like my bread to be too thick on these. You can judge for yourself. Sometimes I may pop the other half of the baguette in the freezer and make more bruschetta the next day, as they are best consumed right after making them.
Read More

Saturday, May 26, 2007

Tropical Chicken Fingers


Tropical Chicken Fingers


Tired of the same old fat laden chicken fingers? These are a nice twist. Toasted coconut, sesame oil and sesame seeds add all kinds of flavour!  They are very tasty dunked in sweet plum sauce and served with an Asian noodle salad or even potato salad and fruit.

Adapted from Crazy Plates

1/2 cup shredded, sweetened coconut

2 tbsp sesame seeds
1/2 cup unseasoned dry bread crumbs
1 egg (the original recipe says 2 egg whites, I'd rather not waste an egg)
2 tsp sesame oil
1 1/2 lbs turkey or chicken breast, cut into strips.

Mix coconut, sesame seeds and bread crumbs into a bowl. Set aside. In a separate bowl, mix together the egg and sesame oil. Pour over the chicken pieces and toss gently. Dredge the chicken pieces in the coconut mixture and place on a greased cookie sheet. The original recipes says to spray them lightly with some cooking spray, but I often skip that step.

Bake at 425 for about 10 minutes, then turn them over and bake for another 5 minutes.

*these are yummy cold in school lunches


Read More
© 2005-2017 all written and photographic content by Scattered Mom/Karen Humphrey (unless otherwise specified) and may not be reproduced or used in any manner without consent. All rights reserved.

© 2014 Chasing Tomatoes, AllRightsReserved.

Designed by ScreenWritersArena