Printfriendly

Showing posts with label squares. Show all posts

Tuesday, September 24, 2013

Chocolate Almond Blondies

chocolate almond blondies

I really don't know how I got this far having a food blog, and had never made blondies. What's my kitchen coming to? This probably has a lot more to do with the fact that I'm a giant fan of chocolate everything, so the very idea of unchocolate-like brownies didn't even register. We're getting into the swing of things with school around here; Kevin's start to grade 12 has been a great one, despite the fact that for awhile there I had no inspiration or time to really get into making lunches, and he ended up with peanut butter for a week straight. Then he caught some sort of cold and I didn't have to make him lunch for a bit because he was at home for a few days.

Of course, I completely forgot to call his school until I'm at work in the middle of a writing lessons with grade sixes, where we are brainstorming fun ideas about how you could say, "I can't go to school today." After telling kids they could talk about being kidnapped by ninjas, and held for ransom by the family dog, it dawns on me that if I don't inform the school of his absence he'll be forced to attend Saturday school.

Oops. *immediately runs to the phone*

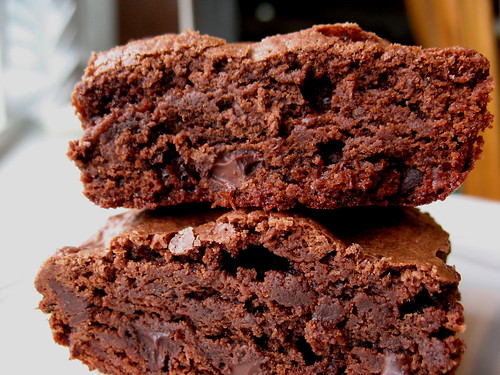
Now  it's week three, and I've finally gotten into the groove by filling the freezer with various treats and things for lunch boxes. Sometimes all you need is a little sweet treat to make your day better. These blondies are chewy and full of chocolate, so much so that you won't miss your regular cocoa based brownie. Well.

Maybe.

Ingredients:

1/2 cup unsalted butter, melted and cooled to room temperature
1 cup brown sugar
1 egg
1 tsp vanilla
pinch of salt
1 cup flour
1/2 cup chocolate chips
1/2 cup sliced almonds

Directions:

Pre-heat oven to 350 F.

Butter an 8x8 inch square baking pan and set aside.

In a large bowl, mix the butter and sugar together until smooth. Beat in the egg and vanilla until they are well combined, and then fold in the flour and salt until combined. Stir in the chocolate chips and almonds. Scrape batter into the prepared pan and smooth the top.

Bake for 20-25 minutes until golden, set, and a toothpick inserted into the center comes out clean.

Cool the squares completely before slicing them up.

Makes 16 blondies

Adapted from Smitten Kitchen

Read More

Sunday, April 7, 2013

Gooey Cinnamon Squares

cin squares 4

Rain is pitter pattering outside our door this weekend, ushering spring into the Fraser Valley. When it's a bit cold and nasty outside, these squares are warm and comforting with a cup of tea while you sit by the fire, staving off the last of spring's chill. A cookie like layer on the bottom is topped with a moist, gooey layer and topped with crunchy cinnamon sugar - if you like French toast or coffee cake, this square is for you.

We spent our Sunday out at Fort Langley trekking around in the rain; browsing through antique shops and candy stores, sipping coffee and listening to the train whistles. Living in the Fraser Valley means we can always find something to do, and coming home to these on the counter was a treat.  When you bake them, the shorter baking time will give you a more gooey square, whereas the longer one will produce something more cake-like. Either way, they are delicious. One thing I especially love about this recipe is the option between corn syrup or honey that Deb Perelman offers. When you have a kid with a suspected corn allergy, it's a welcome treat.

Adapted from The Smitten Kitchen Cookbook

Cookie like base:

1/2 cup unsalted butter, softened
3/4 cup sugar
1 egg
1/4 cup milk
1 1/2 cups flour
1 tsp cream of tartar
1/2 tsp baking soda
1/4 tsp salt

Gooey layer:

1/4 cup honey or light corn syrup
1/4 cup milk, half and half, or heavy cream ( I used 1% milk)
1 tbsp vanilla
3/4 cup unsalted butter, softened
1 cup plus 2 tbsp of sugar
1/4 tsp salt
1 large egg
1 1/4 cups flour

Crunchy cinnamon top:

2 tbsp sugar
1 1/2 tsp cinnamon

Pre-heat oven to 350 F.  Grease, and then line a 9x13 inch cake pan with parchment paper. Set it aside.

Make the Cookie Layer:

In a medium sized bowl, whisk together the flour, cream of tartar, baking soda, and salt. Set aside.

With an electric mixer, cream the butter and sugar together until light and fluffy. Scrape down the sides of the bowl and add the egg, mixing it some more to combine. Stop the mixer and scrape down again, and then add in the milk and mix until well combined. Add the flour mixture and stir until just combined.

Transfer the dough to the pan and using a knife or offset spatula, spread it evenly in the bottom of the pan. Set it aside and clean the mixing bowl and beaters.

Make the Gooey Layer:

Next, in another medium bowl, whisk together the milk, honey, and vanilla. Set aside.

In the clean mixing bowl, beat together the butter, salt, and sugar until light and fluffy. Stop the beater and scrape down the sides of the bowl. Add the egg and beat well. Add 1/3 of the flour, and mix until just combined. Next, add half of the milk mixture and combine. Repeat with 1/3 more of the flour, then the rest of the milk mixture, ending with the last 1/3 of the flour.

Layer this mixture on top of the cookie dough mixture in the pan, spreading it all over top the cookie layer evenly.

In a small bowl, stir together the cinnamon and sugar. sprinkle this evenly over the gooey layer. Yes, this seems like a lot of sugar and in some ways it is, but it works out awesomely.

Bake the squares about 25-30 minutes. The first amount of time will give you a more gooey square, but if you prefer them less gooey then bake them a little longer. I baked mine about 30 minutes. Let them cool completely on a rack before you cut them into squares.

Makes about 24 squares


Read More

Saturday, January 28, 2012

Cranberry Crumble Bars

Cranberry Bars

Christmas often goes by, and I am left with a bag or two of fresh cranberries that I have stashed away in the freezer. Truthfully, I'm not a huge fan of cranberries in baking-maybe it's the tartness, but either way I never have that many recipes to use them. Recently I discovered this recipe, and fell in love with it. These bars are like a crumble, with some orange cutting the tartness of the cranberries and the almond topping giving it a healthy feel. These bars are not hugely sweet and make a great lunchbox snack. I made them a little more adult oriented by adding some Grand Marnier to the cranberry filling, but you can easily skip that.

Adapted from Whitewater Cooks With Friends 

Base
¾ cup butter, room temperature
½ cup sugar
½ tsp vanilla
½ tsp cinnamon
1 ½ cups flour
½ cup ground almonds

Filling
½ cup water
½ cup orange juice
1 cup sugar
2 tsp orange zest
3 cups fresh or frozen cranberries
2 tbsp Grand Marnier

Topping
¼ cup flour
2 tbsp brown sugar
¼ tsp cinnamon
½ cup almonds, roughly chopped
2 tbsp cold butter

Pre-heat the oven to 375 F.

To make the base, stir the sugar, vanilla, cinnamon, flour, and almonds together in a bowl. Cut in the butter with a pastry cutter or your hands until everything is combined. Press the base into a greased 9x13 inch cake pan. Bake the base for about 25 minutes, until golden brown. Let cool slightly.

In a saucepan, heat the water, orange juice, sugar, and orange juice over medium heat until it comes to a boil. Let the mixture boil for about five minutes stirring in the cranberries. Continue to cook and stir for five minutes more while the cranberries pop. Cool somewhat and stir in the Grand Marnier before spreading over the base.

Stir together the flour, brown sugar, cinnamon, and almonds together in a bowl. Using a pastry cutter, cut in the butter until the mixture resembles small peas. Sprinkle over the filling and place the pan in the oven. Bake for about 15-20 minutes. Watch them carefully, as mine had a tendency to cook a little too much around the edges.

Cool and cut into squares. Store in an airtight container in the fridge for a few days, or freeze in a single layer for a few weeks.

Makes about 16.
Read More

Tuesday, August 23, 2011

Chocolate Coffee Ice Cream Brownie Sundaes

Coffee Chocolate Brownie Sundae


Years ago, when I was 19 years old and had just moved to Vancouver from a small interior town in BC, the first job that I landed was waitressing at White Spot in Kerrisdale. One of the best parts about working at White Spot was that the kitchen didn't produce the desserts, the waitresses did- and I loved putting something together that would elicit wide eyes when I presented it at the table.

One of my favorite desserts at White Spot was the hot fudge brownie-dense, chocolatey brownie, topped with vanilla ice cream and drizzled with hot fudge. Who could resist that? In fact, 20 years later, the hot fudge brownie is still on White Spot's menu. A few days ago I had made coffee ice cream, and then still itching for something even more decadent, I baked some brownies.

Sometime yesterday after supper, I finally remembered the White Spot fudge brownies. There was leftover chocolate fudge swirl in the fridge from when we made mint ice cream, and so I grabbed a bowl, put it all together, and handed the bowl to Kevin. His eyes widened as he gave a squeal of joy, then slowly, deliberately, ate every last bite.

If you make anything on this blog, you must make this. The coffee ice cream tastes like a latte, the brownies are dense and hold up to the ice cream well, and the fudge sauce is perfect. If coffee ice cream isn't your favorite flavor, then use this vanilla one instead. If you don't have an ice cream maker, then buy the best ice cream or frozen yogurt you can find.

All three recipes come from David Lebovitz's book The Perfect Scoop. I know, I know-I've been extolling the virtues of this book for awhile now, but you must know that it is well worth buying if you own an ice cream maker. If you don't have an ice cream maker but you love ice cream, I highly recommend that you run out and buy one, AND buy this book to go with it. Besides the basic directions, David gives you tips on how to create a perfect ice cream custard, and dispenses advice on everything from ingredients to equipment and ice cream makers. The recipes aren't limited to ice cream either, but include sauces, add ins like home made mint patties, and everything from cookies to brownies and how to make your own ice cream cones.

I will dare to say that it is the ONLY ice cream book you'll ever need. All three recipes that are following are adapted from The Perfect Scoop. Now go buy that book, already.

Brownies

1/2 cup unsalted butter
4 oz unsweetened chocolate, chopped
1 1/4 cups sugar
2 eggs
1 tsp vanilla
1/2 cup flour
1/8 tsp salt
1/2 cup semisweet or bittersweet chocolate chips
3/4 cup toasted hazelnuts, pecans, almonds, or walnuts chopped

Pre-heat oven to 350 F.

First, you will need to get a 9x9 inch square pan and line it with foil, then butter the foil. Make sure to use enough foil so that you have some overhang, which makes things far easier when you need to lift the brownies right out of the pan.

In a medium sized saucepan over low heat, melt the butter and chocolate together, stirring constantly, until smooth. Set aside to cool slightly. Stir in the sugar until well mixed and then whisk in the eggs, one at a time. Add the vanilla.

Stir in the flour and salt, continuing to whisk well. It's recommended in the original recipe that you "beat the batter vigorously for 30 seconds, until it begins to form a smooth ball". I didn't actually do this, to be honest, but I did give it a good whisk.

Fold in your chocolate chips and nuts, if using. Scrape into your prepared pan and smooth the top before setting it in the oven. Bake for about 30 minutes, or until the center is just set. Remove them from the oven and let cool before lifting from the pan, peeling off the foil, and slicing up.

These brownies will last about 3 days on your counter, wrapped well in cling film or if you leave them in the pan and wrap it with foil. They are also excellent crumbled into ice cream or served topped with a scoop and some sauce.

Makes 12

Coffee Ice Cream

1 1/2 cups whole milk
3/4 cup sugar
1 1/2 cups coffee beans ( I used Buddha Kind-SO good!)
pinch of salt
1 1/2 cups whipping (heavy) cream
5 large egg yolks
1/4 tsp vanilla extract
1/4 tsp finely ground coffee

In a medium sized saucepan, stir together the whole coffee beans, milk, sugar, salt, and 1/2 cup of the cream. Warm the mixture up (don't boil it), and then remove it from the heat, put a lid on, and let it sit for an hour at room temperature and steep.

Get a large bowl, pour the remaining cup of cream into the bowl, and set a strainer on top. You are going to need it later to strain your custard, and it's a good thing to have it all ready to go before you start. Set aside.

While you are at it, get a bowl of ice water ready that is big enough for the bowl that is holding the whipping cream to sit in. Later on you are going to need to sit that bowl holding the whipping cream and your finished custard in the top of the ice water bath and stir to cool it down. Not huge mind you, but enough that the bottom of the bowl holding the whipping cream will touch the ice water. You will want to stop the cooking process and make your custard cool quickly. Set aside.

Crack your eggs and separate them, tossing the whites (unless you have something you can use them for) and keeping the yolks in either a large pyrex measuring cup or a medium sized bowl. Whisk the egg yolks together and keep them near the stove.

Re-warm the coffee infused milk in a medium sized pot over medium low heat, stirring constantly. (don't let it boil!) When it's good and warm, gently pour a little into the eggs, whisking well as you go. Add the milk little by little, whisking constantly, until it's all incorporated. You have to be careful here, just adding the milk little bit by bit, and whisking things really well as you go.

What you are doing is tempering your eggs by adding it bit by bit. Otherwise the hot mixture would just cook the eggs. Ew!

Now that your eggs and warm milk are all mixed together, you need to cook the custard a little. Pour the mixture back into the saucepan and cook over medium low heat, stirring constantly, until the mixture will coat the back of a spoon. (the temperature of the finished custard will be between 170 C - 175 C) again-don't let it boil!

To test if it's ready or not, run your finger across the back of your spoon. There should be a definite line that doesn't fill right back in right away.

Remove the pot from the stove, and pour the mixture through your strainer into the bowl with the remaining cup of whipping cream, stirring. This is to catch any eggy bits that might be in your custard, and to get out the coffee beans. Press on the coffee beans to get out as much coffee goodness as you can. Nestle the bowl onto your bowl with ice/ice water, continuing to stir so that the cooking process is halted and the custard is chilled quickly. Mix in the vanilla and ground coffee.

When it is cool, pour the custard into a container and chill overnight. You could probably chill it for less time, but I find that overnight gives you a better result.

Process your ice cream according to your ice cream maker instructions.

Makes 1 liter

Fudge Ripple

Maybe this was just runnier because I didn't do it right, but there was a little leftover from when I made Mint Ice Cream so I just spooned it on top. Delicious!

1/2 cup sugar
1/3 cup light corn syrup
1/2 cup water
6 tbsp dutch process cocoa powder
1/2 tsp vanilla

In a medium saucepan, whisk together sugar, corn syrup, water, and cocoa powder over medium heat. Keep whisking it constantly while you heat it up, and the edges start to bubble. Bring it to a low boil, still whisking. Let it cook for 1 minute, whisking only occasionally, now.

Take it off the heat and chill in the fridge.

You can, once it's chilled, layer in with ice cream when your ice cream is finished processing in the machine and you are putting it into a container. Just spoon out some fudge ripple and plop spoonfuls here and there while you transfer the ice cream. Don't mix it. Mine didn't go super thick, so I used this as a topping for my brownie sundaes. Either way, it was delicious.

Makes 1 cup.


Read More

Thursday, June 2, 2011

Raspberry Oat Bars

Raspberry Oat Bars


Back when I used to buy granola bars, Nutrigrain bars were one of my favorites. Soft, full of sweet fruit like filling, I bought them often so I could take them in lunches. Last year I resolved to stop buying packaged granola bars, and so I said goodbye to Nutrigrain bars forever. I won't lie and say I don't miss them, because honestly, I kind of do.

Fortunately, these raspberry oat bars came to my rescue. No, they aren't just like Nutrigrain bars, instead they are better. Full of oats, whole wheat flour, and nuts, you can change up the jam filling to whatever flavor you like, and switch the nuts around too. Use all whole wheat flour if you want. Try almonds, walnuts, hazelnuts, along with blueberry, apricot, or rhubarb jams and see what happens. They are so easy to make your kids can help you, and they slice into nice pieces to enjoy with a glass of milk or cup of tea. They also pack well in lunches and you can freeze them too.

Now if I could just stop EATING them....

Want a Bite?


Adapted from Rebar Modern Food Cookbook

3/4 cup flour
3/4 whole wheat flour
2 cups rolled oats
1 1/2 cups walnuts (I used pecans), chopped
2 tsp baking powder
1/4 tsp salt
1 1/2 tsp cinnamon
1 cup + 2 Tbsp unsalted butter, softened
1 1/2 cups brown sugar
1 egg
1 cup raspberry jam (I used a little more)

Pre heat your oven to 350 F.

Lightly grease a 10x15 inch baking pan, or if you are like me and am a huge fan of parchment paper, then hack off a piece and line the pan.

Measure the flours, oats, nuts, baking powder, salt, cinnamon, butter, and brown sugar into a large mixing bowl. With an electric mixer, combine the ingredients until it comes together like a crumble mixture. (you could also do this in a food processor, but I think it would make the nuts into tiny pieces, which might not be your thing)

Remove about 1/3 of the mixture from the bowl and set aside.

Crack an egg into the remaining oat mixture and blend well. Press it into the pan you had lined with parchment or greased and then put it in the oven for about 10-12 minutes, until lightly browned.

Spread your jam all over the baked crust, right out to the edges. I added more jam because it looked super thin to me. Then sprinkle the reserved oat crumble all over the surface of the bars, covering them evenly. Bake about another 12-15 minutes.

Cool completely before cutting into bars. If you want to make these a special dessert, I recommend serving them with a really good vanilla ice cream.

Makes a good sized pan. The recipe says 15 but I think I'd likely cut them smaller.
Read More

Tuesday, March 8, 2011

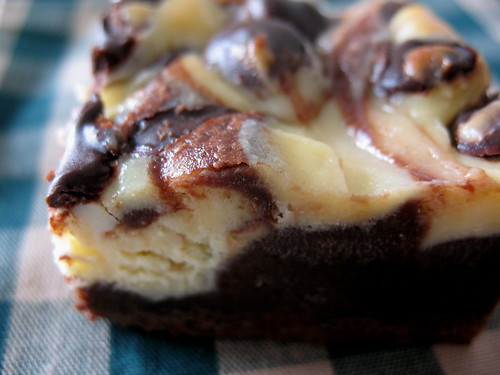
Cheesecake Brownies

This job is difficult, you know. Sometimes I have to find the most amazing, decadent treats and then make them for you. Then I have to fend off two hovering, demanding people as I try to snap photos that will make you drool at your keyboards.

I also have to refrain from eating entire pans of brownies that beckon me in the late of night as I type posts and scroll through pictures. It's cruel, really. I want to just rise from my seat, grab the container and start stuffing my face, but instead I sit here eating Mini Wheats.

Cheesecake is my favorite dessert. Drizzled with chocolate sauce and topped with raspberries, it's a once a year decadent treat that I allow myself to indulge in. When I saw the recipe for this and happened to have a bar of Philadelphia Cream cheese sitting in the fridge, it was as if the heavens opened and the angels sang, serenading me with the very idea of brownies and cheesecake married together in the same pan.

These brownies are good. Really good. So amazingly good that even John, the man with the willpower of steel, broke down and had one. Kevin looked into the oven while they baked and was so overcome with joy at the sight of them, he offered to do the dinner dishes. You must make them but, be warned. They are powerful little things; and you likely won't have the will power to resist their call.

Cheesecake Brownies

Adapted from Gourmet June 2007 and Smitten Kitchen

Brownie layer:
1/2 cup (4 oz) butter, cubed
3 oz unsweetened chocolate, chopped
1 cup sugar
2 large eggs
1/2 tsp vanilla
2/3 cup flour

Cheesecake layer:
8 oz cream cheese, well softened
1/3 cup sugar
1 egg yolk
1/4 tsp vanilla

Pre-heat oven to 350 F and line a 8x8 inch square baking pan with parchment paper.

In a double boiler, melt the butter and chocolate over hot (not boiling) water until smooth. Remove from heat. Whisk in the sugar, and then the eggs one at a time until thick and glossy. Stir in the vanilla, and then fold in the flour until incorporated. Spread batter into the bottom of the pan, smoothing to make it even. Set aside.

Using a bowl with an electric mixer, whip the cream cheese until fluffy. Add the sugar, egg yolk, and vanilla, continuing to beat until smooth. Drop spoonfuls of the cream cheese mixture all over the top of the brownie batter, smoothing and swirling with a knife to get a marbled effect. Sprinkle with chocolate chips.

Bake in the center of your oven for about 35 minutes, until puffed and the center is just set. I let them cool on the counter for about 20 minutes, and then I put them in the fridge. They are best kept in the fridge in a sealed container-and slice best cold, I think.

Makes 16.
Read More

Sunday, February 13, 2011

Chipolte Brownies

Chipolte brownies


Close to Christmas, I went to a friend's house to have some tea and she served the most amazing brownies. Perfectly chewy but fudgy in the middle, with a teeny bit of spicy heat, they were amazing.

So of course I begged for the recipe and she, being the most wonderful friend in the world, complied.

Now I made a few changes of course, and you may want to try them, or keep the recipe as is. We're lucky to have access to Denman Island Mole Chocolate, which is amazing in these brownies, with a little smoky heat at the end but so very subtly and certainly not too spicy. In fact, if you aren't looking for it you might miss the slightly spicy after taste. If you have Denman Island Mole Chocolate available, I say you should try it. If you don't, follow the recipe as is with the cayenne pepper. I also used some cocoa from the Vanilla Food company, which was just amazing in this recipe. So dark and rich, I'm spoiled for any other cocoa again.

At any rate I dare you to eat just one. I doubt you'll be able to!

Adapted from In the Kitchen with a Good Appetite by Melissa Clark

1 cup plus 2 tbsp unsalted butter
3 oz unsweetened chocolate, chopped (or 2 Denman Island Chocolate Mole bars)
1 1/2 cups flour
1/2 tsp salt
1/8 tsp cayenne
1/2 cup plus 1 tbsp cocoa powder
2 1/2 cups sugar
3 large eggs, lightly beaten
1 tbsp vanilla extract (I used Madagascar vanilla from The Vanilla Food Company)
Maldon salt, for sprinkling (I omitted)

Pre-heat your oven to 350 F, and then line a 9x13 inch pan with parchment paper

In a medium sized saucepan over low heat or in a double boiler, melt the butter and chopped chocolate together, stirring, until smooth. Take off the heat and allow to cool slightly.

While your chocolate is getting all melty and fabulous, whisk the flour, salt, and cayenne in a bowl and set aside.

Measure out the sugar and cocoa into a large bowl and dump the melted chocolate mixture right on top, whisking it up until it's well combined. Gently whisk in the eggs and vanilla, stirring it well until it's all thick and glossy.

Stir in the flour mixture gently. You don't want to overmix it. Sprinkle with Maldon salt flakes (or you could just do without) Spread the batter into your lined 9x13 inch pan, smoothing the top so it's all even.

Bake for 25-30 minutes, or until a knife inserted in the center comes out clean. Allow to cool completely before cutting into squares.

Makes 24 (2 inch) brownies
Read More

Thursday, January 20, 2011

Caramel Pecan Brownies

Caramel Pecan Brownies


Besides awhile ago when I tried to make maple caramel popcorn (and scorched a finger), I've never made caramel. Years before I've always just picked up Hershey's caramel sauce to spoon over ice cream or whatever else I had handy, but never have I made it from scratch.

Until I made these brownies.

Speaking of bought caramel sauce, what is IN Hershey's caramel sauce anyway? (cut and pasted from here)

high fructose corn syrup; corn syrup; sweetened condensed milk (skim milk and sugar); water; CONTAINS 2% OR LESS OF: modified cornstarch; disodium phosphate; natural and artificial flavor; sodium citrate; Monogycerides; salt; carrageenan; caramel color; artificial color (yellow 6; yellow 5)

Notes:
According to Wikipedia, Yellow #5 is Tartrazine

What's in MY caramel?

White sugar, water, lemon juice, butter, whipping cream, and a pinch of salt.

I like my caramel better. In fact, it was so good I never plan to buy caramel again. Ever. okay, okay-it was a little tricky, and you have to pay attention, but I know you can do it. However because it IS a bit technical, I have devoted a whole post to it that you want to read before you start. TRUST ME.

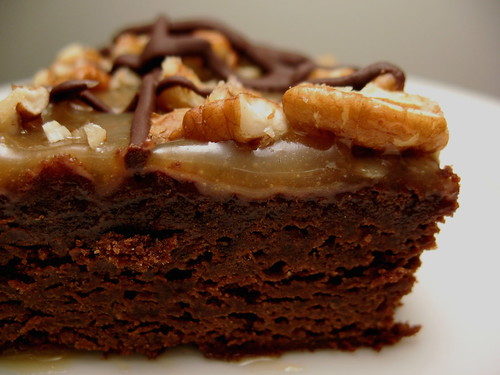
These brownies are amazing. Much like a Caramilk bar, they are dark and delicious with a gorgeous layer of caramel, then toasted nuts and drizzled chocolate take them over the top. I brought half a pan to work and was told, with no reservations, that I was sincerely loved.

Adapted from Fine Cooking

6 oz (12 tbsp) unsalted butter, cut into squares
4 oz good, unsweetened chocolate, chopped
4 large eggs
1 3/4 cup sugar
1 1/2 tsp vanilla
1/4 tsp salt
3/4 cup flour
1/4 cup unsweetened cocoa powder
1 1/2 cup pecans, chopped (optional)

Topping (caramel sauce):
1 batch of caramel
1/2 cup whipping cream
3 tbsp unsalted butter
1 tsp vanilla extract
1/4 tsp salt

Ganache Drizzle:
2 oz bittersweet chocolate, chopped (although I used semi-sweet and it was fine)
1 tbsp whipping cream
1/2 cup pecans, toasted and chopped

Line a 9x13 inch pan with parchment paper, leaving enough so it extends up the sides for handles (these brownies are a bit messy, this will help with clean up).

Pre-heat the oven to 350 F.

Measure out the flour, salt, and cocoa into a small bowl and stir. Set aside.

In a saucepan over low heat, melt the butter and chocolate together, stirring until smooth. Set aside to cool slightly.

Using a large bowl, whisk the eggs together until well blended. Gradually add the sugar, continuing to whisk until well mixed in. Pour in a small amount of cooled chocolate, whisking, to temper the eggs a little (you don't want to cook your eggs with the chocolate). Dribble in the chocolate a little at a time, stirring as you go, until you've dumped the whole lot in.

Stir in the flour and cocoa until it's nice and blended, then add the pecans (if using).

Pour the batter into your parchment paper lined pan, smoothing it out to make sure the batter is distributed evenly. Bake in the center of a 350 F oven for 20-22 minutes, until a toothpick inserted into the center comes out with just a few crumbs clinging to it.

Press down any spots that are puffed up or have a bubble-you want this baby to be nice and flat as you are going to then pour caramel sauce all over it.

Let your freshly baked pan of brownies sit on the counter for a good 10 minutes or so to cool. While it's doing that, make your caramel sauce. Start with making a batch of caramel (instructions here). After your caramel turned brown and looks done, remove the pot from the heat and add in the whipping cream. It's going to boil up, but don't worry-stir until it's calmed down, then whisk in the butter until melted. Stir in your vanilla and salt.

Allow the caramel to cool for just a couple of minutes, then pour the caramel over the brownies. Some is going to pool in the corners and drip down the sides, but no matter. Just use a knife to try to evenly disperse the topping. Let the brownies cool on the counter for about 45 minutes, then transfer the pan to the fridge to cool for an hour.

Once the brownies are cool and the topping has set a bit, melt the chocolate with the cream over low heat. Pour the mixture into a resealable sandwich bag and snip off one corner, then drizzle chocolate all over the top of the caramel in a random design. Sprinkle with pecans.

I like these best kept in the fridge, in a sealed container. They last about 5 days.

Makes a 9x13 inch pan of brownies-how many depends on how big you like them!
Read More

Wednesday, December 1, 2010

The Very Best Lemon Bars

Lemon Bars

About three years ago, I began the hunt for the perfect lemon square recipe. I tried them from near and far, by Martha, Canadian Living, and more. Not ONE fit the bill. Some were too puckery, the filling too runny, the bottoms too hard, nothing was just right.

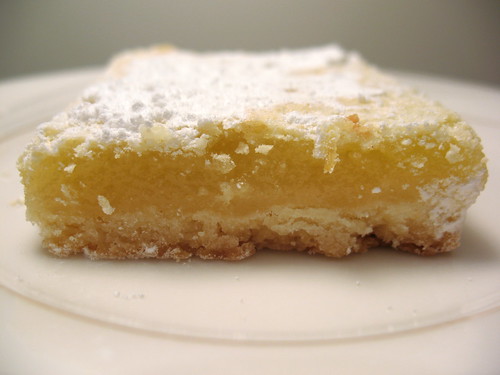
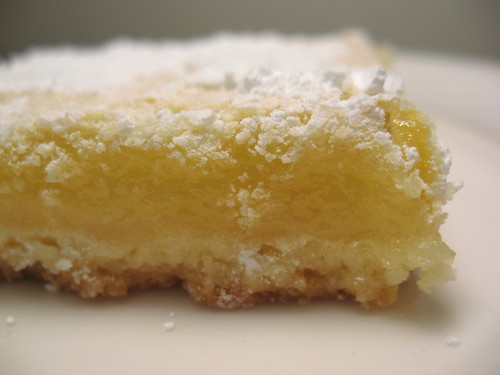
I was doomed to wander the Earth, searching for the perfect lemon bar until last week, when they suddenly appeared in the staff room; not too sweet, or too sour. The proportion of filling to base was perfect. They were soft, but not runny. The staff literally fought over them, trying to get just ONE before they were devoured with sticky, icing sugar covered fingers.

In other words, I had found perfection. Before the bell went, I raced down the hall, found the student whose mother it was rumored had produced those amazing bites of heaven, and begged, practically on my knees, to have it. In front of a whole pile of teenagers, right there in the hallway.

Now I'm going to share it with YOU! If you were here, I'd hand you the pan and tell you to please take them away, because I really could literally eat them ALL.

Adapted from the Fannie Farmer Baking Book

Crust:
1/2 cup unsalted butter, softened
1/4 cup icing sugar
1 tsp grated lemon zest
1 cup flour  **if you are allergic to wheat flour, you can directly substitute barley flour**
pinch of salt

Filling:
2 eggs
1 cup sugar
2 tbsp flour  (or barley flour)
*3 tbsp freshly squeezed lemon juice
*1 tsp grated lemon zest
(*note: It was recommended I add more zest and a little more juice, depending on how juicy the lemons are. I'd try another 1/2 tsp more zest and an extra tbsp juice in total. Buy 2-3 lemons for the small pan, 3-4 for the large one just to be safe.)

Pre-heat the oven to 350 F, and line a 9x9 inch square pan with parchment paper. This recipe also works well if you double it and use a 9x13 inch pan.

Make the crust:

In a bowl with an electric mixer, mix the butter and sugar together until fluffy. In a separate bowl, whisk the flour, salt, and lemon zest together. Add to the butter mixture and combine. The result will look like a butter cookie dough. Press it evenly into the bottom of your parchment paper lined pan.

Bake for 15-20 minutes, until the edges are browned. Remove from the oven and pour in the filling.

While it Bakes, Make the filling:

In a clean electric mixer bowl, combine the eggs, sugar, flour, lemon juice and lemon zest. Mix well. Pour over the warm crust and return it to the oven for about 20 minutes, until the top is dry and the edges are just starting to brown. Remove from the oven and let cool.

When completely cooled, dust the squares with icing sugar, and slice. I keep them in a sealed airtight container in the fridge. I doubt they will last very long!


Finally! The Perfect Lemon Bar!


See? Wasn't that easy?

If you plan to make these ahead, freeze them and just dust with icing sugar before you serve them.
Read More

Tuesday, November 23, 2010

Guinness Brownies

Guinness Brownie


With three cans of Guinness sitting in the cupboard, I knew I had to do something with them, but I wasn't sure what. Awhile ago I had found this recipe over on Nosh With Me and intrigued, I went back and read the recipe.

It sounded good, but beer and chocolate? I was skeptical.

On the other hand, my teenager reasoned, Nigella makes a Guinness cake, so perhaps she's onto something so maybe we should try them? Finally my curiosity got the better of me and I found myself at the store picking up a slab of bittersweet chocolate.

This afternoon as I followed the recipe's directions, I became increasingly worried; this isn't how I've made brownies before. Would they turn out? Would they be weird? It didn't help that Kevin noticed I had Guinness Draught instead of Guinness Extra, and what would that do? I had to keep shooing the teenager away as he would come and investigate the batter, the head on the beer, sniff the beer, ask if he could taste the beer, the latter of which garnered a resounding, "NO!"

Snow fell lightly outside, chickadees hopped about on the porch, and the smell of chocolate filled the house as the brownies baked. When I pulled them from the oven, the smooth chocolate top looked perfect, but it wasn't until I cut them into neat slices and finally took a bite that I was completely SOLD. Kevin found me standing in the kitchen, eyes closed, nibbling on a piece of brownie as if it was ambrosia of the Gods and we needed to build a shrine, immediately.

These are quite possibly the best brownies ever. i know I say that about every brownie recipe I try, but with this one, I really mean it. Rich, dark, fudgey, not tooth achingly sweet, these are over the top delicious. I'd try serving them with a scoop of Bailey's Irish Cream Ice Cream and chocolate shavings for a special occasion. They are SO good that even I, a completely non beer drinking gal, will buy beer just so I can make them.

1 cup flour
3/4 cup unsweetened cocoa powder
1/4 salt
6 tablespoons unsalted butter, room temperature
8 ounces dark bittersweet chocolate
3/4 cup white chocolate chips
4 large eggs, room temperature
1 cup sugar
1 1/4 cups Guinness Extra Stout beer, room temperature, no foam (I accidentally used Guinness Draught, which was fine)
1 cup semisweet chocolate chips

Line a 9x13 inch cake pan with parchment paper, or just grease the pan with butter. Pre-heat your oven to 375 F.

Melt the white chocolate, bittersweet chocolate, and the butter together over low heat, stirring, until melted and smooth. Set aside to cool.

Beat the eggs and sugar together for about three minutes until light and fluffy. Take a spoonful of it and stir into the cooled chocolate, just to make sure it's cooled enough before you add it to the egg mixture. Pouring in hot melted chocolate will cook your eggs, otherwise.

Pour in the rest of the chocolate and mix well. In a separate bowl, stir the flour, cocoa, and salt together. Add to the egg/chocolate mixture and stir until just combined. Now this is the tricky part; add the beer, and carefully whisk. I tried to whisk in the stuff and slopped it all over myself, so be careful. Gently work in the beer until the batter resembles cake batter, and then fold in the chocolate chips.

Pour into the prepared pan, smooth the top, and pop it into the oven. Bake for 25-30 minutes, or until a toothpick inserted into the center comes out clean. You don't want to over bake these, so start checking them to see if they are finished at around 25 minutes. Remove from the oven and let them cool before you cut into slices.

Makes a 9x13 inch pan of gloriously chocolatey brownies.
Read More

Sunday, September 26, 2010

Emma Waverman and Eshun's One Pot Brownies

Stacked


I love brownies. As you can tell from the amount of brownie recipes on this site, I don't think you can ever have too many ways to make them-and yes, every time I find a new recipe I try it. When I came across this recipe by Emma Waverman, resistance was futile! Emma is the coolest-we chat a lot on twitter, I read her blog, and I'm going to get to meet her in person at Blissdom! I'm so excited!

The brownies were amazing; while still warm, melty and gooey, Jake and I gobbled down big bites of them with cold glasses of milk. Even Hubs succumbed to the chocolatey goodness and had a piece. It was resolved then and there that I must make another pan for lunches, and take one to school for a co-worker. They are that yummy.

Emma and Eshun's One Pot Brownies

(adapted from Whining and Dining, found on Lucy Waverman's site)

1/2 cup unsalted butter
2 oz bittersweet chocolate, chopped
1 cup sugar
2 large eggs, beaten
1/2 cup flour
1/4 cup cocoa, sifted (preferably Dutch processed..in Canada, that would be Fry's)
1/2 tsp salt
1/2 tsp vanilla
1/2 cup nuts (optional)
1/2 cup chocolate chips

Pre-heat your oven to 35o F and line an 8x8 inch square baking pan with parchment paper. Parchment paper is the bomb. What I love about it is that you can just lift the brownies out of the pan when they are cool and they make for such easy clean up.

In double boiler over hot, but not boiling water, melt the butter and bittersweet chocolate until smooth, stirring. Let cool slightly. Whisk in the sugar and then the eggs, until the mixture is thick and glossy.

In a separate bowl, stir together the flour, salt, and cocoa. Add to the chocolate mixture, stirring until just combined. Fold in the chocolate chips and the nuts, if using.

Spoon batter into your pan, spreading it evenly. Lick the knife. Obviously.

Bake for about 25 minutes, or until you test them with a cake tester and you still have a few moist crumbs clinging. Let them cool on a rack before slicing up and devouring greedily.

Makes 12 decent sized brownies, although the recipe says 32 (12 in our house) Hey, they're thin. Or we're pigs. You decide.


Emma's Brownies
Read More

Wednesday, August 25, 2010

Maple Pecan Sticky Bars

Maple Pecan Sticky Bars


I love, love, love maple. These bars are kind of like pecan pie, but with a maple twist. They are super rich and delicious so you only need a small piece, but so good you might want to go for a bigger one. With ice cream.

I highly recommend this recipe. It will become a staple in our house for Thanksgiving, Christmas, and special occasions, because it's one of those recipes that is so good that I can eat the whole pan myself. Therefore I can't make it often!

Now..as I read the comments over at Bon Appetit on this recipe, I noticed that people were complaining about things but I think they made a few baking errors. First, the crust is like a butter cookie dough so don't worry that it seems a bit crumbly when you mix it. As long as you can take some and squeeze it together, and it forms a clump, you're good. If yours feels too dry and won't come together at all, add a little more butter.

Adapted From Bon Appetit October 2003

Crust:
1/2 cup unsalted butter, room temperature (I used salted and skipped the salt later on)
1/4 cup sugar
1 large egg yolk
1 1/2 cups all purpose flour
1/8 tsp salt

Filling:
1/2 cup pure maple syrup
1/3 cup packed brown sugar (recipe said gold brown, I used regular brown)
1/4 cup whipping cream
3 Tbsp unsalted butter
1/2 tsp vanilla extract
1 1/2 cups coarsely chopped pecans

Preheat your oven to 350 F. Line a 9x9 baking pan with parchment paper. I highly recommend you use the parchment, because if the filling overflows it can make a sticky mess.

Crust:

In a bowl with your electric mixer, beat your butter and sugar until creamy. Add the egg yolk and beat well. Scrape down the sides of the bowl. Measure in the flour and salt, then blend together on low. It will seem dry-but stop, put the mixer aside, reach in and grab a bit. Does it clump together when you squeeze it? If so, it's perfect. If not, add in a bit more butter. You aren't looking for a wet dough, but instead something that is a little dry but will come together. Also, it's a BUTTER cookie dough, don't add water!

Dump the mixture into your pan. Press the bits firmly along the bottom and sides, making sure to work your way about 1/2 inch up the sides of the pan. This is important! Try to make the crust evenly thick, but it's not imperative. Bake the crust for about 15-20 minutes, or until golden. Set it aside and let it cool.

Filling:

In a saucepan, heat up the maple syrup, brown sugar, whipping cream and butter over medium heat until the butter melts and the mixture is warm. Continue heating, stirring, until it boils. Let it boil about 30 seconds. Remove from the heat and stir in the vanilla and pecans, stirring them so they are well coated.

Pour the filling over the crust. You'll notice that the sides that you created keep it all neatly in the square, instead of running under the crust and making a mess. Smooth it out as best you can so that it's even.

Bake the bars in the center of your oven for 15 minutes. Cool them in the pan on a rack before cooling them further in the fridge. They must be cooled well in order to cut nicely-at least a few hours.

Keep the bars in an airtight container in your fridge. They will last about 3 days. The recipe claims that they make 30 bars, but with our servings here at home, that was more like 12. You can cut them very small, as they are really rich-but why would you?

Makes one 9x9 inch pan.
Read More

Saturday, August 7, 2010

Oatmeal Turtle Bars


I LOVE Turtles. They are one of the few chocolates I can eat, because they have pecans. Yum! These bars were good, but I found that the caramels became a bit hard once the bars cooled. I think next time I would make the base, scatter the caramels over top, then top with the chocolate mixture, and the rest of the oat mixture. Or something. Anyway, I would make sure the caramels are covered sufficiently so they don't become rock hard from direct exposure to the heat, does that make sense?

They were REALLY good if you heated them up a teeny bit in the microwave before eating, and with ice cream? Yummmmm.

Adapted From Nosh With Me

3/4 cup butter
3/4 cup sugar
3/4 cup brown sugar (packed)
1 egg
1 3/4 cup flour
1/2 tsp baking soda
1/2 tsp salt
1 1/2 cups quick cooking (not instant) oats
1 cup purchased caramels, halved

3/4 cup chocolate chips (the recipe said milk chocolate, I used semi-sweet)
2/3 cup sweetened condensed milk
2 Tbsp unsweetened cocoa powder
1/2 cup pecans
1 tsp vanilla

Line a 9x13 inch pan with parchment paper, or you could grease it well. I like parchment-makes for easier clean up. Pre-heat your oven to 350 F.

In a bowl with an electric mixer, cream the butter and sugars together until fluffy. Add your egg and blend well. In a seperate bowl, mix together the flour, baking soda, and salt with a fork. Add to the butter mixture on low speed, until it's just combined, and then add in the oats. The end result will look like oatmeal cookie dough.

Crumble 2 cups of the dough into the bottom of your pan, pressing it together into a crust out to the edges. Set aside.

Add the halved caramels to the rest of the dough and mix it up well with a wooden spoon.

In a saucepan, melt the chocolate chips with the condensed milk and cocoa over low heat, stirring often, until smooth. Remove from heat, stir in the pecans and vanilla, and let cool slightly. Pour the chocolate over the oatmeal base, and spread to form a thing layer.

Scatter the rest of the oatmeal dough/caramel topping evenly over top. Bake for about 20-25 minutes until golden and topping is firm. Allow to cool completely before cutting into bars.
Read More

Thursday, December 3, 2009

Peanut Butter Brownies

When I first saw these on Crepes of Wrath, I knew immediately that I had to make them. How could I resist? Seriously?

This recipe should come with a warning label. The brownies are, without a doubt, the richest, sweetest, most decadent things I've had in a long time. They would be amazing served warm with a scoop of good quality ice cream. Jake exclaimed that they were the best things he'd every eaten.

You will need:
2 eggs
2 cups packed brown sugar
1 cup peanut butter (room temperature)..I used smooth, recipe says chunky
1 cup butter, melted and cooled slightly
2 tablespoons molasses
2 tablespoons honey
2 teaspoons vanilla
1/2 teaspoon salt
2 cups flour
1 cup peanut butter chips
1 cup semi sweet chocolate chips

The original recipe says to bake the brownies at 375 F in a 9x13 inch pan. I halved this recipe and then baked them in a 9x9 inch pan, at 350 F, which turned out okay. Then I made another batch at 375 F and they almost burned. My advice? Go with 350 F. That's the usual brownie/cookie temperature anyway.

Line your 9x13 inch pan with parchment paper.

Beat the eggs and brown sugar together, and then add the peanut butter, molasses, honey, vanilla, and melted butter. Mix well. Scrape down the bowl, then add in the flour and salt, mixing on low speed until it's all incorporated.

Fold in the chocolate and peanut butter chips. In the original recipe, you are to sprinkle the chocolate chips over top, but there's something about the combination of dark chocolate and peanut butter chips that make these sublime. Instead, I folded in the chocolate chips and sprinkled yet MORE chocolate on top, gently pressing them into the batter.

Because that's how I like my brownies; drowning in chocolate.

Anyway, spread the batter evenly into your parchment paper lined pan, and pop it into the oven on the middle rack. I still say 350 F is the best bet, and you want to bake them about 30 minutes. This is where the recipe gets a bit finicky-I wasn't sure if they were baked or not, yet the edges seemed to be overcooking and the middle too soft, which was a problem. Both times the edges turned out a bit drier then I wanted. You might want to use a knife to gauge whether the brownies are cooked in the middle (if the knife comes out clean you are good to go) rather then eyeballing it as I have, because eyeballing doesn't work so well.

Let them cool on a rack before slicing into bars.

Makes 20-24 bars.

Read More

Tuesday, October 27, 2009

Ghoulish Halloween Brownies


Aren't these adorable? Yogurt coated pretzels make fantastic ghoulish faces with out any effort whatsoever!

1. Bake One Bowl Brownies. I added some white chocolate chips instead of nuts, for effect. Allow to cool.

2. Make the glaze and pour over top of the brownies, spreading and smoothing to cover them evenly.

3. While the glaze is still liquidy, place the pretzels on top. I placed them 4 across, in 6 rows.

4. Gently pop in the Mini M&Ms. Careful not to get the glaze on your fingers and mess up the pretzels. If you get some on your fingers, just lick it off.

5. Allow glaze to cool and harden a bit. While it was still soft I sliced the brownies, then put them on a pan in a single layer in the fridge to harden up. Store brownies in an airtight container.


Boo!
Read More

Sunday, July 26, 2009

Blueberry Crumble Bars


I love the blueberry bars at Starbucks. LOVE. So when I found this recipe in Canadian Living, I was all for it! These aren't like Starbucks bars; buttery, more oatmeal, more substantial; but still have a great blueberry taste and oh my, warmed up with a scoop of Chapman's Frozen Yogurt....

I tweeted after eating this that it took ALL my self restraint not to lick the plate. Really. It did.

Adapted from Canadian Living

2 1/2 cups rolled oats (not instant)
1 1/4 cups flour
1 cup packed brown sugar
1 Tbsp grated orange rind
1/4 tsp salt
1 cup cold butter, cubed

3 cups fresh blueberries
1/2 cup sugar
1/3 cup orange juice
4 tsp cornstarch

Filling:
In a medium sized pot, combine the blueberries, sugar, and orange juice. Bring to a boil. Turn the heat down and allow to simmer for about 10 minutes, until tender. Whisk the cornstarch in a small bowl with 2 Tbsp of water and and then whisk into the blueberries, cooking until thickened. Remove from heat.

Pour blueberry sauce into a bowl and cover with plastic wrap. The plastic wrap needs to be actually touching the surface of the sauce to prevent a skin from forming.

In a large bowl, combine the rolled oats, flour, sugar, orange rind, and salt. Cut in the butter with a pastry blender until you have coarse crumbs. Actually I found this a bit difficult and ended up using my hands!

Press about 1/2 of the mixture into a 9 inch square cake pan that has been lined with parchment paper. I can't really stress the parchment paper enough; this makes the squares really easy to remove from the pan and cut. Next, pour the blueberry filling on top of the pressed bottom and spread evenly. Top with leftover oatmeal mixture. I didn't actually use all the oatmeal mixture, I had a bit leftover.

Bake at 350 F for about 45 minutes, until light golden and bubbly. Let cool in the pan and when cool, remove from pan and cut into squares. You can keep the squares in an airtight container in the fridge for about 2 days, or transfer to the freezer for about 2 weeks. Allow them to come to room temperature before serving-and they are especially good warmed slightly in the microwave and topped with a dollop of vanilla frozen yogurt.

Yum!

Makes about 20 squares.
Read More

Tuesday, April 14, 2009

One Bowl Brownies

One Bowl Brownies

Dark and chocolatey, these brownies are one of my favourites. I love the sweet glaze on them and how they make a nice big pan. We make these often because they don't last long at all, and are one of my go-to recipes when I need to take a treat somewhere. You don't have to put nuts in them, but you can if you want.

When you glaze these, it may seem a little thin and and runny, but it does set up quite nicely. If you're in a hurry and want to eat them as soon as possible, stick the pan in the fridge for a bit and it will encourage the glaze to set up sooner.

Adapted from Baker's Chocolate

4 squares Baker's unsweetened chocolate
3/4 cup butter
2 cups sugar
3 eggs
1 tsp. vanilla
1 cup flour
1 cup chopped nuts (I used pecans-this is optional)

Melt butter and chocolate together over low heat until smooth. Remove from heat. Add sugar and stir until well blended. Whisk in eggs, one at a time, until mixture is glossy-add the vanilla and stir well.

Fold in flour and nuts. Spread batter into a 9x13 inch pan lined with lightly greased tin foil (make sure to leave some overhang for 'handles').

Bake at 350 F for about 25-30 minutes, until a toothpick inserted in the center comes out with just a few moist crumbs clinging to it. Be careful not to over bake!

Chocolate Glaze:

Melt 4 squares of semi-sweet chocolate with 2 Tbsp butter and 2 Tbsp water over low heat, stirring constantly until smooth. Pour over warm brownies and allow to cool completely.

To slice, lift the brownies from the pan and set on a large cutting board. If you use a knife dipped in hot water, it makes a nicer cut.

Makes 24 brownies.

Store in a sealed container for about 2 days on the counter, or freeze for up to 2 weeks.

Read More

Wednesday, January 28, 2009

Cappuccino Cheesecake Brownies

Cappuccino Cheesecake Brownies


Chocolate and cheesecake. Who could ask for a better combination then THAT? These brownies are absolutely delectable. I love how the dense brownie pairs with the coffee flavoured cheesecake on top. These make a great dessert or special addition to a dessert tray if you're going somewhere special and best of all, they are very easy to make!

Adapted from Canadian Living, Feb 2009

3oz bittersweet chocolate, chopped
1/3 cup butter
3/4 sugar
2 eggs
1 tsp vanilla
3/4 cup flour
1 tsp baking powder
1/2 tsp salt

Cheesecake:
1 cup softened cream cheese (brick style)
1/3 cup sugar
1 egg
1 tsp instant coffee granules
1 tsp vanilla
1 tbsp flour

In a double boiler, melt chocolate with butter. Let cool a bit. Whisk in sugar, eggs, and vanilla. Stir in the flour, baking powder and salt, then set aside.

Cheesecake layer:
In a bowl with an electric mixer, beat the cream cheese until smooth. Add the sugar and beat well. Beat in the egg. Dissolved the coffee granules in the vanilla and add to cream cheese mixture, continuing to beat until combined. Stir in flour.
Set aside.

Preheat oven to 350 F. Line an 8 inch square baking pan with greased foil, leaving a 1/2 inch overhang on the sides. Remove 1/2 cup of brownie batter to a small bowl and set aside. Spread the remaining batter in the square baking pan. Spread the cheesecake batter over top. Next, drop the reserved brownie batter by the spoonful over top of the cheesecake batter. Run a knife through the batter to make it swirl.

Bake the brownies for about 30-35 minutes, or until a knife inserted into the center comes out clean. Let cool in the pan, and then cover and transfer to the fridge and chill over night.

Makes about 20 small squares. Store wrapped in the fridge for about 3 days, or you could probably freeze them too!
Read More

Tuesday, August 26, 2008

Every Day Brownies

They're still Warm!


Why should you make these brownies? They are quick and full of chocolate, ready to be topped with some ice cream or tucked into a lunchbox. I like to have a variety of recipes so that if I'm out of the ingredients for one, chances are I'll have them for another. These brownies ton't need to be topped with icing, but you can toss on some chocolate chips to make them extra special.

(the original recipe is by Melissa McMacken)

1/2 cup unsalted butter
1 cup flour
1/4 tsp baking powder
1/8 tsp salt
2 oz unsweetened chocolate, coarsely chopped
1 oz semi sweet chocolate, coarsely chopped
1 cup brown sugar, packed
1/4 cup sugar
2 large eggs
1 tsp vanilla
1 cup chopped pecans
3/4 cup chocolate chips

Melt chocolates and butter over low heat on the stove until smooth. You could use a double boiler over simmering water, but I often don't. Let the chocolate cool a bit. Whisk in the sugars, and then the eggs one at a time, whisking well after each, and then the vanilla.

In a separate bowl mix the flour, baking powder and salt together with a fork. Dump into the bowl with the chocolate/egg mixture and stir until just combined.

**At this point, if you want to add 1 cup chopped pecans, go for it! I can't eat nuts so I omitted that step.

Pour the batter into a greased 9x9 inch square baking pan and smooth the top. Sprinkle with a few handfuls of semi-sweet chocolate chips and press them down gently (don't submerge them though).

Bake in a pre-heated oven at 350 F for about 30 minutes. Allow to cool completely and then pop them out of the pan and slice. Mmmm! I couldn't even resist taking a bite during the photo op.

Oops!  Took a Bite!

Makes one 9x9 inch pan, or about 12 brownies.
Read More

Thursday, June 26, 2008

Pumpkin Squares


Pumpkin Squares


Years ago I took these bars to a Halloween party at a friend's house and they won second place in her dessert bake off.  While they are a little bit like pumpkin pie without the crust, the cream cheese icing gives them a flavor close to carrot cake.  We love these as an easy dessert, and they are so quick to put together that even the kids could help.

Pumpkin Squares
Company's Coming Holiday Entertaining

1/2 cup butter or margarine
1/2 cup sugar
1/2 cup brown sugar, packed
2 eggs
14oz (398 ml) canned pumpkin
1 cup flour
1 tsp cinnamon
1/4 tsp ginger
1 tsp baking powder
1/2 tsp baking soda
1/4 tsp salt.

With an electric mixer, beat together the butter and sugars. Add eggs one at a time and beat well. Stir in pumpkin. Add the rest of the ingredients and stir until just combined. Pour into a greased 9x13 inch cake pan, smooth the top,  and bake at 350 F for about 25 minutes or until a toothpick inserted in the center comes out clean. Cool completely before frosting.

Cream cheese icing

4 oz (125 g) cream cheese
1/4 cup butter or margarine
1 tsp vanilla
2 cups of icing sugar

Beat cream cheese and butter together until smooth. Add vanilla and about 1/2 cup of icing sugar at a time. If the icing is too thick, thin it with a little milk. Frost squares.

**These squares do not freeze well. Keep them in a sealed container in the fridge. Yummy!
Read More
© 2005-2017 all written and photographic content by Scattered Mom/Karen Humphrey (unless otherwise specified) and may not be reproduced or used in any manner without consent. All rights reserved.

© 2014 Chasing Tomatoes, AllRightsReserved.

Designed by ScreenWritersArena