Printfriendly

Showing posts with label Candy. Show all posts

Thursday, January 12, 2012

Oreo Cookie Bark

Oreo Cookie Bark 3


A few years ago I made this addictive snack for Christmas, never dreaming how utterly amazing it is.  My guys are not into chocolate bar, and yet as I sat the pan to cool on top of the deep freeze in the garage, they couldn't help but break off bits as they walked by.  One evening, I found my husband, lips covered in chocolate.

Yes. He'd been into the Oreo bark.  It's addictive and downright scrumptious.  Also really easy, as there's only 3 ingredients and you can easily get the kids to help you.  Break up bits and divide into bags, then give to friends and family for Valentine's Day or Easter.

Adapted from Kraft Canada

15 Oreo cookies, cut into quarters
12 oz semi sweet chocolate
6 oz white chocolate

Melt the semi sweet chocolate in a microwave or on low heat in a saucepan. Remove from heat. Add the Oreo cookies and stir very gently. Turn out onto a foil lined cookie sheet and spread out with a knife-try to spread out the cookies so they aren't in a clump but instead a single layer. Make sure to keep it thin so it's easy to break when cooled.

Melt the white chocolate and drizzle on top, filling in the thin spots.

Allow to cool and harden.

Try not to eat the entire pan.

Variation.....broken pieces of candy cane would be delectable in this, or you could add Easter colored M&Ms, or for Valentine's day even some cinnamon hearts.
Read More

Wednesday, December 21, 2011

Chocolate Covered Candied Orange Peel

Orangettes


 For the longest time, I thought that I didn't like the taste of chocolate and orange.  What I eventually realized is that it's not that I don't like that particular flavor combination, but rather that I don't like cheap or artificial chocolate and orange.  These home made bites are amazing-so much better than anything you can buy, and make a delicious Christmas gift.  We even liked the candied orange peel without the chocolate!

The recipe is very easy, uses few ingredients, but it does require a little time and patience. 

Adapted from Smitten Kitchen

4 navel oranges

Simple Syrup:
1 cup water
1 cup sugar

16 oz of dark chocolate for coating

Cut one end off the orange so it would sit flat if you set it down on a counter. Then score the peel top to bottom, so that you can peel it off in about 4 sections.

Thinly slice (but not super thin) the peel into strips. Do this to all four and set aside the oranges. You can eat them for a snack or something, because you don't need them anymore. It's only the peel you need to worry about.

In a pot of boiling water, blanch the orange peels for a couple of minutes. Remove them with a slotted spoon, rinse, and then blanch them again. This removes all the bitterness from them.

In a different pot, bring the one cup of water and one cup of sugar to a simmer, stirring until the sugar melts. Add you blanched orange peels, turn the heat to low, and put a lid on. Let them simmer away for about an hour, checking on them every so often to turn down/up the heat if you need to.

After an hour, remove the peels from the syrup and set them on a wire cooling rack in a single layer. I put a piece of parchment paper underneath, as the syrup dripping off of the peels is sticky and then I had less clean up. Set them aside and let them dry. I let mine dry all night, and they were perfect in the morning.

Melt 16 oz dark chocolate in a double boiler set over hot, but not boiling, water until smooth.  With a waxed paper lined cookie sheet nearby, dip the peels in the chocolate one by one.  This is a messy process, and a little time consuming, but worth it.  Set the dipped peels on the lined cookie sheet to dry until they are set.

I'm not sure how to describe how these turn out once they've sat and the chocolate has hardened up.  The peel, which you'd think would stay chewy, actually goes kind of soft in the center.  These taste just like the chocolate oranges that you smack to break apart, only they are SO MUCH BETTER.

Makes about 2 cups


Inside an Orangette
Read More

Wednesday, December 7, 2011

Butterfinger Truffles

butterfinger truffle


One thing that I love about Christmas is all the different treats to make to either grace your dessert tray or give as gifts.  These truffles are very easy, and if you love Butterfingers, just the right treat for you!  You can double the batch to make enough to give to friends, family, and give away to guests at an open house, or just make it as is and have some for your own Christmas goodie tray.  Either way, make sure to use really good quality cocoa and chocolate in these for the very best flavour!

Adapted from Bon Appetit

5 oz semi-sweet chocolate (no more than about 61% cacao), chopped
1 1/2 tsp unsalted butter
1/2 cup heavy cream
3/4 cups chopped Butterfinger candy bars (about 4 oz, or around 2 bars)
2 tsp unsweetened cocoa powder
chopped roasted, unsalted peanuts


In a saucepan over medium low heat, warm the cream until it is boiling.  Measure out the butter and semi sweet chocolate in a bowl and pour the cream over top.  Allow it to sit before stirring until smooth to remove any lump.  Add the chopped Butterfingers and stir.

Chill the mixture in the fridge for about 2 hours, or until it's hardened up.  Scoop out 3/4 inch balls and roll between your palms into a ball, then roll in the cocoa powder to coat, then garnish with chopped peanuts or peanut halves.  Chill.

Store the truffles in an airtight container for up to 1 day.

Makes about 40
Read More

Monday, January 17, 2011

Making Caramel

Last year I made maple caramel popcorn without actually reading anything about working with caramel. That was dumb, mostly because I then ended up frying some fingers of mine. Ouch! To make sure that all of you are armed with everything you need to know, I found a great video on Fine Cooking to help you along. I had the magazine version in hand to follow, and my caramel sauce turned out deliciously-with no fried fingers!

Tips:

-Don't be distracted. This stuff is HOT, people.
-Caramel goes from light brown to burned quicker than you think. Don't leave the pan. EVER.
-Don't stir it, swirl the pan. Stirring tends to make sugar crystals form
-The pastry brush thing works. Keep it handy, right by the stove. A long handled one is best, if you have it.

Check out BakedBree's blog post about making caramel sauce-lots of great photos so you can get an idea what I'm talking about. Don't let her comments about failing spectacularly scare you off though, you CAN make this!

Also, watch this video. It might help.


Recipe for Basic Caramel (adapted from Fine Cooking)

1 cup sugar
1/4 tsp fresh lemon juice
1/4 cup cold water

Have some cold water handy nearby in a measuring cup or bowl, with a pasty brush.

Pour the sugar, lemon juice, and cold water into a 2 quart pot. Brush down the side of the pot with the pastry brush dipped in water to get rid of any sugar crystals, and bring the mixture to a boil over medium high heat. Don't stir! You don't need to. Just watch it carefully while it cooks, brushing down the sides of the pot to get rid of sugar crystals every now and then.

After cooking for about 5-8 minutes, the sugar will start to change color. Give the pot a swirl so that the color evens out, and watch carefully. Swirling also helps the caramel cook evenly, instead of having some spots burn on you. The color will continue to darken. What you want is medium amber, which should take about 30 sec after it starts to darken. As soon as it's the color you want, take the pot off the stove.

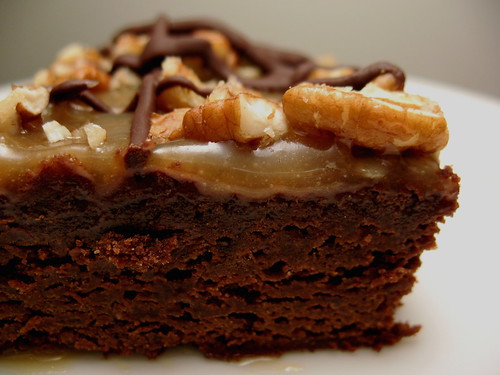
Now you can use your caramel to make sauces, and more. Most caramel sauces need butter and whipping cream, which will be coming up soon, along with the recipe for these incredible chocolate caramel pecan brownies. Oh MY.

Caramel Pecan Brownies
Read More

Wednesday, October 6, 2010

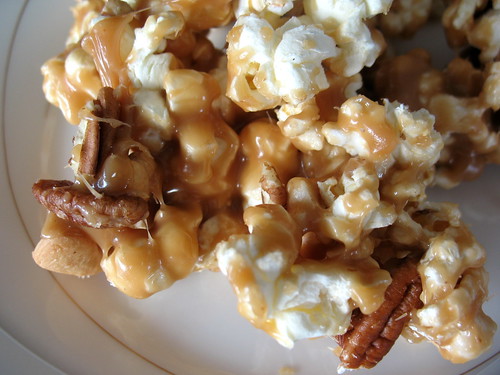
Maple Pecan Caramel Corn

Maple Pecan Caramel Corn


Perfect for fall, this tasty treat doesn't come from a store full of salt, preservatives, etc, but from your own kitchen. You don't need anything special to make it, except for a good deep saucepan, a large metal bowl (glass will crack) or roasting pan, and a candy thermometer. A few tips before you start:

1. Be organized. Read the recipe carefully and have all your ingredients set out ready to go before you begin cooking the caramel because once you get going, you must stand and stir it constantly-it's not a fix and forget kind of recipe.

2. Kids can't help with this one. As I found out the hard way, hot caramel is dangerous.

3. Have a bowl of ice water nearby just in case you get caramel on yourself.


On to the recipe!
Adapted from Canadian Living

10 cups of plain popped popcorn (about 1/2 cup unpopped kernels)
1 1/2 cups pecan halves (I used 1 cup pecans, 1/2 cup cashews)
1 1/3 cups sugar
1 cup butter
1/4 cup maple syrup
1/4 cup corn syrup
1/4 tsp salt
1 tsp maple extract

First, to pop the popcorn I have a super easy method; get a brown lunch bag, put in about 1/4 cup of popcorn kernels, and microwave on high for about 2 to 2 1/2 minutes. This makes the best popcorn without any oil! Just let it pop away until the popping sounds are about 2-3 seconds apart, then stop the microwave. Don't let it burn.

Grease a large metal mixing bowl (or a roasting pan-something that can withstand lots of heat) with butter. This keeps the caramel from sticking to it. Dump in the popcorn and the nuts. Set aside.

Measure the butter, sugar, maple syrup, salt and corn syrup into a large, deep saucepan. Over medium low to medium heat, bring to a boil while you stir. At this point, do NOT leave the caramel. You have to stand and stir it constantly so it doesn't burn. Have a candy thermometer handy so you can keep track of the temperature. Boil and stir, stir, stir (careful! It's hot!) until the candy reaches just under 300F, and then remove the pot from the heat. The candy will keep boiling and continue to get hotter, so don't wait until it's right at 300 F. Stir in the maple extract. It will boil up, but stir it in well. Get a wooden spoon handy.

Now at this point, you gotta be FAST. Pour the caramel over the popcorn, stirring it to coat. The caramel is going to start thickening up, and so you want to get as much as you can out of the pot and onto the popcorn to coat it, without getting any on yourself. This is where I burned myself, and I won't lie-it hurts like hell.

Once you have the caramel all over your popcorn and nuts, you've stirred it all up and it's coated, dump the hot caramel/nut mixture out onto a baking sheet lined with wax paper to let it cool. When it's cool, break into chunks and store in an airtight container and store for up to 1 week.

Makes 10 cups

*Variation: Try adding in different kinds of nuts like peanuts, pistachios, almonds, etc.
Read More

Friday, February 5, 2010

Kaluah Truffles for 2


I always have wanted to make truffles, but every recipe I have found always makes a zillion of them, so I have never taken the plunge. Then I found this one and decided that finally, I'd DO it.

Truffles really are very easy. Whip cream, chocolate, a little butter, and some liqueur if you want, all melted together and shaped into balls, then dipped in chocolate. I think the trick here is to use really good chocolate, not your cheap bulk bin stuff. Bakers has this lovely 70% cocoa chocolate that I picked up, and then I had some Lindt bars in my baking cupboard that I used for the dipping part. With such a small batch you really can go with the good stuff and not break the bank.

The only thing I was a bit perturbed by was trying to shape them. There must be a trick that I am totally missing, because I'd scoop out the chocolate goodness and the second it would hit my hands, it would melt. They were slightly messy to shape and frustrating to anyone with *cough* perfectionist tendencies. I resorted to using a melon baller, but even at that some of my undipped truffles looked conspicuously like turds on a plate.

The upside is that as soon as they were dipped in chocolate and greedily devoured, the original turd-like resemblance was forgotten because they were beyond delicious. Better than any store bought truffle I have ever eaten in my entire life, really.

If you are looking for a tiny batch to try, this is the recipe for you.

Makes 6 truffles

Adapted from Canadian Living
2 oz bittersweet chocolate, chopped (I recommend you use a good quality 70% cocoa)
2 Tbsp whipping cream
1 tsp butter
2 tsp Kaluah (you could try Bailey's or Grand Marnier as well)

1 oz of good quality dark chocolate, for dipping (you might need more...I melted about 1.5-2 oz and had some leftover)

In a saucepan over very low heat (or you could do this in a double boiler, but I never bother), melt the chocolate, butter, and cream all together. Stir it lots. You will have this wonderfully thick, creamy mixture that will take restraint NOT to eat right then and there.

Stir in the Kaluah, if you are using that.

Spoon it all into a bowl, cover, and put in the fridge for about an hour until it's good and cold.

Now the shaping part gets a little tricky. Do your best to scoop the stuff out into 1 tsp sized balls and roll between your fingers (palms of your hands just warms it up and makes a gooey mess) to shape them. A melon baller is really good for this. Don't try to be perfect. Stick them back into the fridge to chill for a bit.

Melt the dipping chocolate over low heat in a sauce pan until smooth. One by one, dunk your little truffle centers and set them on a wax paper lined plate to dry. You can put them in the fridge to speed up the process.

Store them in the fridge in an airtight container for up to a week, or freeze them for up to 1 month.

Heh. Right. Like they'd last that long.
Read More

Thursday, December 24, 2009

Rum Balls


I had planned to make these awhile ago, but when drama unfolded around here they were pushed to the back burner. Not needing as much as originally, I halved the recipe-which worked really well! They are chocolatey, rummy, and oh SO delicious. From now on, I think these are going to be one of my Christmas must have recipes.

Recipe originally from Canadian Living. Don't ask me what issue, I have no idea.
4 oz semi sweet chocolate, coarsely chopped (bittersweet might be even better)
1 pkg (200g) chocolate wafer cookies
1 cups finely chopped walnuts or pecans
3 tbsp sweetened condensed milk
1/3 cup rum
1 tsp vanilla
chocolate sprinkles

Melt semi sweet chocolate in a bowl over hot, not boiling, water until melted. Set aside and let cool. Whiz chocolate wafers in a food processor to make 2 1/3 cups (actually, you could probably just purchase already crushed Oreo cookie crumbs); transfer to a large bowl. Add 1 cup nuts, condensed milk, run, and vanilla; stir in chocolate. Chill, covered, for 1 hour or until firm.

Shape mixture by teaspoons into balls and roll in chocolate sprinkles to coat. Chill in an airtight container for up to 2 weeks. If you must, drink the leftover rum.

Makes 70. Unless you scarf them down when nobody's looking.

Read More

Tuesday, July 14, 2009

Home made Turtles


Inspired to try these candies (because I just loooove Turtles), I took the plunge. Was it worth it? These are really, really good. Just work intensive. If you like to make candy and spend time stirring, dipping, shaping, then it's a recipe for you! The original recipe is from Company's Coming Holiday Entertaining

1 lb of pecans
1 1/2 cups corn syrup
1 cup butter
1 cup packed brown sugar
1 cup sweetened condensed milk

2 cups chocolate chips
1/4 cup of butter
1/2 bar of Parowax

*here is where I tweaked it. I suppose that the wax allows the chocolate to set better, but I didn't like the idea of wax in the chocolate. So instead I used:
350 g semi sweet chocolate squares
350 g bittersweet chocolate squares
1/4 cup of butter

And then when I ran out of that....
300 g semi sweet chocolate chips
6 oz unsweetened chocolate
1/4 cup butter

Spread the pecans over the bottom of a greased 9x13 inch and an 8x8 inch pan.

In a heavy saucepan, combine the first amount of butter, sugar, and condensed milk. Bring to a boil. A candy thermometer is handy here, although even with one I found that I made the caramel a bit too chewy. It's better to be a bit on the softer side. Once the mixture boils, stand and stir, turning the heat down and allow it to bubble gently for about 25 minutes or until it reaches 250 F to the medium hard ball stage (if a small amount is placed in ice water it will hold it's shape but can be easily flattened).

Pour the mixture over the pecans. Let it set.

Spoon out pecan mixture into small clumps and set them on a wax paper lined cookie sheet. Freeze for easy dipping.

Melt the chocolate and second amount of butter over hot, not boiling water in a double boiler, stirring, until smooth. Remove from heat.

Dip the caramel/pecan clumps into the chocolate, tap against the side of the pot to get rid of the excess chocolate, and set back onto the waxed paper.

These will seem to take forever to set. Be patient! I even left them overnight and they were perfect by morning.


The original recipe says it makes 5 dozen, but I ended up with double that.
Read More

Sunday, December 7, 2008

Chocolate Cherry Mice

By Kelly Buchholz

Christmas, a time of lights, presents, carols and chocolate mice. At least in our household. The tradition began as Christmas cookies, decorated by my children with a variety of sprinkles, chocolate chips, shredded coconut and occasionally even leftover Halloween candy. While the result was always bright and festive, they weren't always entirely edible by any but the most dedicated sweet tooth. And then one year we stumbled onto the recipe for chocolate mice, which are not only cute, easy, and extremely edible, but these days my husband starts getting requests for them from his co-workers in November.


This is how it's done:

1 cup chocolate chips
2 tsp. shortening
24 maraschino cherries
24 chocolate kisses

In the microwave, melt the chocolate chips and shortening. Stir until smooth. Holding a dry cherry by its stem, dip it into the melted chocolate and then press it onto the bottom of a chocolate kiss. Place this on wax paper. You've now successfully attached the mouse's body to it's head. Stop to remind your kids not to lick their fingers. Wait while they rewash their hands, because your warning came too late. For the ears - while the chocolate is still warm, take two almond slices and wedge them gently between the kiss and the cherry.

Refrigerate until set.

Tips:
- make sure your cherries have stems and are well drained
- you can use almond bark or Hershey's candy bars in place of the chocolate chips, eliminating the need for shortening
- you might choose to give your mice eyes with gel icing applied with a toothpick
- instead of setting the mice on wax paper to dry, try putting each one onto the cream side of an open Oreo.

Voila - mice cookies!
Read More
© 2005-2017 all written and photographic content by Scattered Mom/Karen Humphrey (unless otherwise specified) and may not be reproduced or used in any manner without consent. All rights reserved.

© 2014 Chasing Tomatoes, AllRightsReserved.

Designed by ScreenWritersArena