Printfriendly

Showing posts with label Beans. Show all posts

Tuesday, August 23, 2016

Chick Pea, Tomato, Avocado and Tuna Salad with Feta

The weather has been scorching here, and the last thing I want to do is turn on the oven. That's where this salad comes in-you simply open a few cans, chop some things, and pour the works into a bowl. It's really simple, and was so tasty we were shoveling spoonfuls into our mouths.

If you have a sulphite allergy you have to be very careful with fish; generally most seafood and fish are dusted with sulphites on the boat to keep them from going bad. According to Eat Right Ontario, sulphites are allowed on canned tuna. Read your labels! If in doubt, just leave out the tuna, and a couple hard boiled eggs might be nice substitution. I used Clover Leaf tuna, and on their site is this handy chart that informs you of the allergens that might be present in their products. When I wrote and inquired, they said that none of the tuna is dusted with sulphites either on the boat or in the processing plant. Yay!

chick pea salad

Salad (serves 4)

one 19 oz can chick peas, drained and rinsed well
one can of Clover Leaf Skipjack in water Tuna
2 cups mixed cherry or grape tomatoes, halved
1 green onion, minced
1 avocado, peeled and chunked
8 basil leaves, thinly sliced
2 oz feta cheese (I use Tre Stelle)

Dressing:

1/2 fresh lemon
3 Tbsp olive oil
1/2 tsp honey
pinch salt
pinch pepper*

Directions:

1. Toss all your salad ingredients into a large bowl. Set aside.

2. Measure the dressing ingredients into a mason jar, put a lid on, and shake it until well blended. The honey might settle to the bottom, so you may need to get a spoon and give it a good stir. Drizzle it over the salad and toss again.

3. Season if you need to. I added a little more salt, but the feta adds enough.

I served this with Cobs Turkish loaf-the one topped with salt and pepper. YUM.


Read More

Tuesday, April 1, 2014

Mexi Pasta Toss with Windset Farms

Treats from Windset Farms!

I love fresh, crunchy vegetables. In our house, cherry tomatoes are eaten by the handful on their own or with slices of cheese, and sweet peppers are munched on in lunches, dipped in hummus, tossed in salads, or just about any way you can imagine. In the summer, being veggi-fied (is that a word?) kicks into high gear and our fridge is always bursting with all kinds of produce. What can I say? We love our vegetables. Every day, I take a small container of sugar snap peas, carrot sticks, grape tomatoes, and pepper slices in my lunch. Grape tomatoes and the mini peppers are quick and easy to pack-and eat!

One of my favourite brands to buy that's greenhouse grown is Windset farms. The cukes, peppers and tomatoes are always so delicious and they are readily available. This post isn't really sponsored by them; I've bought their veggies for a few years now and often chat with them on twitter. Since BC Veggie Day was recently and we were celebrating green house grown tastiness that is now making it's way into the grocery stores, the nice folks over at Windset Farms sent me the above veggies  I wasn't asked to post anything, but offered to because I loved them so much. I immediately got down to work and transformed the veggies into something delicious-not that those lovely tomatoes weren't delicious enough that I wanted to just sit and munch them raw, all by themselves.

Mexipasta 2

Anyway you really should try this pasta. It's not a heavy, full of cheese and sour cream or other greasy stuff that some would associate with Mexican type food. It's light and bursting with all kinds of things that are good for you-veggies, beans, some cheese, and a bit of spice. We came up with it on the fly and ended up eating the leftovers the next day for lunch, too.

Ingredients:

200 g of fusilli pasta
1 shallot, peeled and sliced
2 cloves garlic
3/4 tsp chili powder
1/2 tsp cumin
salt and pepper to taste
1 cup sweet peppers, slivered
1 cup halved cherry tomatoes
1-2 chunked avocados
1/4 cup chopped fresh cilantro
1 cup Mexicana Touch of Philadelphia Cheese
fresh lime
*like it spicy? Add a bit of chopped fresh jalapeno

Directions:

Get the water boiling and cook the pasta according to the package directions. While it's bubbling away on the stove, heat up a large, deep pan and saute up the shallots in a little olive oil until they are softened. Add the garlic (and jalapeno if using)  and continue to saute until fragrant. Stir in the beans, chili powder and cumin, stirring and cooking it for another 2-3 minutes. Take the beans off the heat and set aside.

When the pasta is finished cooking, reserve about 1/3 cup of the cooking water. Drain the rest. Add the hot, drained pasta to the pan with the beans and shallots, tossing and adding a little of the reserved water to moisten, and then stir in the cheese. Transfer everything to a large bowl.

Toss the pasta and beans with peppers, tomatoes, avocados and cilantro until everything is well mixed together.

Serve the pasta with slices of lime to squeeze over top.

Makes 4 servings


Read More

Monday, January 27, 2014

BBQ Baked Beans with Smashed Sweet Potatoes


BBQ beans

I've been watching a lot of Jamie Oliver these days. Besides doing social media really well, Jamie's new book Save With Jamie is my new favorite. In fact, this week I'm bringing you a few of his recipes that I'm trying out. Honestly, it's really hard not to just cook the entire book, which by the end of 2014 I just might. There's so much good stuff in there!


I love baked beans, but my other recipes involve the slow cooker, and one needed maple syrup (which I'm out of), so I thought I'd try this one. I wasn't sure about the sweet potatoes in it. Would that work? Would they taste weird? The answers are yes, they work-and they are delicious. Are they weird? Not at all. In fact the slight sweetness of the sweet potatoes against the sort of spicy beans is a really wonderful combination. We had it with some Buckeye Beans Cornbread from The Missing Ingredient, and it was perfect for soaking up any extra sauce. If you can find this cornbread, it's really tasty!

cornbread 2

Serves: 6

Time to prepare: 15 minutes

Time to cook: 1 hour 15 minutes

Ingredients:

2 red onions, sliced
2 cloves garlic, minced
1 chile ( I used a birds eye chile without the seeds)
2 carrots, peeled and chopped
1 heaped tsp smoked paprika
1 level tsp cumin seeds
4 small sweet potatoes
3 1/4 cups of passata or one 28 oz can of crushed tomatoes
two 14 oz cans beans (I used kidney and black beans)
1/3 cup BBQ sauce
2 sprigs fresh rosemary
2 oz Cheddar cheese, grated
crusty bread or cornbread
sour cream or plain yogurt

Directions:

In a large, deep frypan, saute the onions, garlic, chile, and carrots with the paprika and cumin seeds in a bit of olive oil until softened and they get a bit of color, about 10-15 minutes or so. Meanwhile, heat the oven to 350 F.

Pour in the passata, BBQ sauce and beans. Some passata will stay in the jar so add a little water, give it a swish and add to the pan.  Give it all a good stir. Transfer the lot to a 9x13 baking dish.

Remove the leaves from the rosemary sprigs, toss them with a little oil, and sprinkle on top. Put the entire thing in the oven. It is going to look soupy, but I promise you that the extra liquid will evaporate and it will be nice and thick. You may even want to add a little more water if if looks a bit dry.

Prick the sweet potatoes, rub them with olive oil, and set them on a small pan to roast beside the beans in the oven. Let it all cook for an hour, stirring the beans occasionally.

When it's finished, sprinkle the cheese over top, slice down the middle of the sweet potatoes and give them a squish, then set them right in the beans. Pop the whole thing back in the oven for the cheese to melt. Serve with crusty bread or corn bread, and even a bit of sour cream for people to dollop on their portion if they wish.


Adapted from Save with Jamie
Read More

Monday, September 30, 2013

Spiced Lentil Soup with Coconut Milk


spiced lentil soup

Lentils, according to one of my favourite chefs, are one of Canada's most under appreciated ingredients. Cheap, healthy and filling, they really should be in your pantry. This soup was very easy to make and I had everything already in my pantry! I love the mild curry flavour with the coconut milk. It's really filling, freezes well, and packs nicely in a lunchbox.

How low can you go tip: If you roast a whole chicken, make stock out of the carcass and then freeze it to make this soup at a later date. Also, coconut milk and tomato paste freeze really well so you can keep them around to use in other recipes as well.

Ingredients:

10 oz (1 1/2 cups) dried split red lentils
2 tbsp olive oil
1 large onion, peeled and finely chopped
2 cloves garlic, minced
salt to taste
1 tsp ground cumin
1 tsp ground coriander
2 tsp garam masala
1-2 tsp ground ginger
1/2 tsp tumeric
1 Tbsp tomato paste
5 cups chicken stock
3/4 cup coconut milk

Directions:

In a large soup pot, saute the onion in olive oil until lightly browned and softened. Add the garlic and continue to saute for about a minute more, stirring and taking care not to burn it.

Add the cumin, coriander, garam masala, ginger, and tumeric. Toast the spices a bit, stirring, over the heat. Stir in the tomato paste as well and then the lentils.

Pour in the chicken stock and bring the soup to a boil, then turn down and simmer, uncovered for about 25-30 minutes. You may need to watch and top up with some chicken broth if it gets too thick as the lentils cook and expand. It will get really thick, almost like oatmeal, but don't add too much broth because in the end you are going to add some coconut milk.

When the soup is cooked, puree half of it in a blender or food processor. Pour the pureed soup back into the pot and add about 1/2 - 3/4 cup of coconut milk. Heat through.

Serve with chopped cilantro to garnish.

Makes 4-6 servings

Adapted from Gordon Ramsay
Read More

Saturday, September 7, 2013

White Bean, Bacon and Spinach Pot Pies


bacon bean stew

Did you survive back to school craziness? In my house back to school also means back to work for me (this year I'm working with grade sixes), and Kevin is starting grade 12.

I cannot even begin to express my excitement over the very idea of him being finished school. If you really want to know why, you can read about a gazillion posts over on Notes From the Cookie Jar. In the end, we know you're not here to discuss school, you came for a recipe, right?

Of course. Fall is coming. You can feel it in the air, can't you? That cool tinge, the dry leaves already on the ground, and the crazy thunderstorms working their way across the Lower Mainland are all clues. We're not used to thunderstorms and have spent a few nights the last couple weeks on our back porch, watching the sky light up and listening to the crack of thunder. I've started making more fall-type food as well.

Pot pies, usually made with chicken in my house, are a favourite but this time I wanted to try them with beans, veggies, and bacon. The original recipe had a home made pastry top as well but in the craziness of errands and back to school, one night I found myself staring at it and resolving that I was not going to be a slave to my kitchen, so I substituted phyllo instead. Light and crispy, it seemed to be the ideal topping. I must confess that I've never been a huge fan of pastry, so phyllo seemed to be the perfect alternative-and on a busy night, you bet that it is. You could still add chicken to this if you wanted-just throw in some leftover cooked bits if you have them floating around in your fridge somewhere. You can also use swiss chard instead of spinach, and make the whole thing dairy free if you want. It's that easy!

Ingredients:

4 oz (115 grams) of bacon
1 large onion, chopped
1 large carrot, peeled and diced
1 stalk celery, diced
pinch of red pepper flakes
2 garlic cloves, minced
4 cups (8-10 oz) thinly sliced baby spinach or  Swiss chard leaves
salt and fresh cracked pepper to taste
1 tbsp fresh thyme leaves, chopped
2 cups white beans, drained and rinsed

3 1/2  tbsp butter (to be dairy free, you can use margarine or bacon fat)
3 1/2 tbsp flour
3 1/4 cups chicken broth

3 sheets of phyllo pastry
olive oil

Bake your bacon in the oven. While the bacon is cooking away, it's a good time to chop all your veggies. Drain a little of the fat off the bacon into a deep fry pan and set over medium heat. Saute the onion, carrot, celery, red pepper flakes, and garlic until softened. Stir it frequently so that the garlic doesn't burn and turn the heat down if it appears to be a bit hotter than it should be.Stir in the spinach or swiss chard leaves and continue to cook another 2-3 minutes until they are wilted.

When the veggies are cooked, transfer them to a bowl and set aside. By now your bacon should be cooked as well. Drain on paper towels, chop and add to the bowl of veggies along with the beans.

In the pan that you cooked the veggies in, add the butter and set it over medium low heat until it is completely melted. You could, if you wish to make this dairy free, use the leftover bacon drippings instead. Stir in the flour. Continue to cook and stir a bit until it becomes a little browned. Begin adding the broth, little by little, stirring well as you go, to keep it smooth. When you have added all the broth bring the sauce to a boil. Turn the heat down and allow the mixture to continue to bubble away, stirring it frequently, for about 10 minutes until it's thickened.

Stir in the bacon, bean and veggie mixture, stirring until blended and heated through. Taste for seasoning and add salt and pepper if you feel it's needed. Stir in the fresh thyme. Take the pan off the heat and set aside. Ladle the stew into 4 or 5 oven proof bowls.

Pre-heat your oven to 350F.

Unroll a sheet of phyllo as pictured below. Brush half of it lightly with olive oil.


phyllo1

Fold it in half, enclosing the part brushed with olive oil inside.

phyllo2

Brush half of it with oil again, and fold again.

phyllo3

You will end up with a rectangle or square of phyllo. Lay it on top of the bowl of stew, letting the sides hang over the edge. Brush the pieces hanging off lightly with olive oil and fold in the edges to make it look neat.

phyllo4

Place the bowls on a baking sheet and place in the oven for about 15-20 minutes, until they are browned and crispy.

baked3 
 
When I eat mine, I like to remove the top and holding the phyllo, spoon the stew on top, biting into the crispy phyllo with the creamy beans and salty bacon. It makes for a little bit messy, but really delicious dinner.

This recipe makes four servings, and you can make the stew a day ahead if you need to.

Adapted from Smitten Kitchen
Read More

Monday, July 15, 2013

Arugula Roasted Red Pepper and White Bean Salad

In the summer when it's really hot, I often find dinner inspiration by going to the local farm markets and just looking over produce. Often you can make a great meal with everything you find there and a few things in your pantry, which makes for some amazingly cheap and healthy eating.

Don't let the anchovies scare you off. They don't give you a fishy flavour at all, just some salty depth that melds into the salad. When I'm buying them, it seems to make more sense to buy the ones that come in a jar that I can screw a lid back on rather than the sardine tin unless I plan to use them all fairly soon. Sure, the jar is more expensive but they last longer and I'm not throwing away leftover anchovies.  Also, you could use baby peppers for this salad, but if they are very small you might need a few more than four. I think some fresh avocado may add some great flavour to this salad as well. Pair it up with some crusty bread or home made focaccia and you've got yourself a tasty lunch or light dinner. The bread in the photo actually is Turkish Bread from Cobs Bakery, which is one of the only bakery chains where we can get bread that's not full of soybean oil or soy flour.

Roasted Red Pepper and White Bean Salad


Ingredients

4 small red/orange/yellow bell peppers
2 anchovy fillets packed in olive oil, minced
1 clove garlic, minced
2 tsp sherry vinegar
3 tbsp extra virgin olive oil
1/4 cup chopped fresh flat leaf parsley
1 can (15 oz) small white beans /white kidney beans
2-3 tbsp freshly grated parmesan cheese
1-2 cups packed baby arugula, watercress, or a mixture of the two

Directions

To roast the peppers, you can use a few different methods (a barbecue, over a gas burner) but I just use the broiler on my stove. In my case, I turn the broiler to high, cover an old baking sheet with foil, and broiled the peppers about 4-6 inches from the element until they are blackened and blistered. Set them aside and allow them to cool before peeling off the skins and cutting the peppers in half (or quarters like I did), removing the core and the seeds. (see more detailed directions here)

In a small bowl, whisk together the anchovies, sherry vinegar, garlic, olive oil, and parsley. Set aside.

Toss the peppers, arugula, and beans with the dressing and parmesan in a large bowl. Divide the mixture among four plates and give each a sprinkle of salt and cracked pepper. Serve immediately.

Makes 4 servings

Adapted from Martha Stewart Living

Want more dinner salads? My family loves them.

Roasted corn and black beans with feta on baby greens

Grilled chicken with avocado and melon


Read More

Sunday, June 3, 2012

Maple Baked Beans


Maple Baked Beans


Some time ago, I talked with @mama_b on twitter about maple syrup.  I used to see many recipes with recommendations to use dark maple syrup, or graded 'b', but I couldn't ever find it.  Well-@mama_b lives near a (you guessed it) sugar shack and she so kindly offered to send me a jug of syrup.  It's so dark and full of flavour I can't help but use it well, almost anything, especially these beans. 

If you like the sweetness of baked beans with a hit of maple and some salty bacon, these beans are amazing.  They are something you can put in the slow cooker and then just forget about for awhile. We loved them served with barbecued chicken and salad, and they make fantastic leftovers!

Adapted from Spilling the Beans

1/2 small onion, finely chopped 
1/2 cup maple syrup
2 Tbsp sugar
2 Tbsp molasses
2 Tbsp dijon mustard
2 Tbsp tomato paste
1 garlic clove, minced
pinch or two of cayenne pepper
1/4 tsp salt
two 19 oz cans kidney beans, rinsed and drained
one 19 oz can black beans, rinsed and drained
2 slices of bacon, diced 
1 cup water

Combine all ingredients in a slow cooker. Cook for about 6 hours, keeping an eye on them and topping up with a little more water if they get too dry. The moisture won't evaporate quite as much as if they were baked in the oven, but the beans do soak some of it up.  If they are a little soupy for your liking, just cook them longer.  The bacon will cook in the beans and incorporate nicely.  

Serves 6-8
Read More

Monday, April 30, 2012

Chicken Corn Chowder with Bacon and Cheddar


Chicken, Bean, Corn Chowder

I've always liked corn chowder. There's something about a creamy, hearty, thick soup with bits of bacon and vegetables that is really tasty after a long motorcycle ride. John and I went out today and wound our way along the Sunshine Coast Highway, drinking in views of the ocean in the crisp spring air. Once back home, I whipped this up and we ate it with thick slices of baguette to dip in the sauce. You could fry up a little extra bacon to use as a garnish, but I admit I ate the extra piece. This soup is a great way to use up any leftover chicken or turkey you could have hanging around, as well as home made stock. I didn't have any, so I used pre-made stock and poached a bit of chicken.

Adapted from Spilling the Beans

3 slices bacon, chopped 
1 onion, finely chopped 
1 stalk celery, chopped 
2 Tbsp flour 
1 tsp cumin 
4 cups chicken stock 
1 red skinned potato, diced 
2 cups white beans, rinsed and drained 
12 oz (341 ml) can of corn (or you can use 1 ½ cups of frozen/ fresh corn cut right off some cobs 
1 cup cooked, chopped chicken 
½ cup whipping cream 
1 cup sharp cheddar cheese 

 In a large soup pot, fry up the bacon until crisp. Remove to paper towels and blot. 

 In the same pot using the bacon grease, sauté the onion and celery until tender. Stir in the flour and cumin for about a minute, then add the stock, potato, and beans. Bring to a boil over medium heat and then turn down to medium low and simmer until the potato is tender, about 10-15 minutes. 
Taste your bits of potato to make sure they are as tender as you like. Take the pot off the heat and stir in the cream, bacon, corn, cheese, and chicken. Stir well and put back on the heat to warm through, but don’t let it boil. 
Makes 6 servings
Read More

Saturday, February 4, 2012

Spicy Chicken and Tiny Beans

White Bean Chili


Last summer, when we were in Rapid City I ordered the best white chicken chili at the Firehouse Restaurant. Spicy, creamy, and delicious, I needed to recreate it's tasty goodness once I arrived home. The thing is, re-creating a dish is a bit tricky and it doesn't always capture the tasty goodness that we had in the restaurant. This chili isn't very spicy, as we didn't want to scare the non-spicy eaters of the house. It's a very mild dish, but feel free to bump up the flavors however you need to. I suggest adding some chopped pickled jalapeno peppers, which I'm sure will add some amazing flavor!  For this recipe you can use any white beans, but I used Great Northern ones.

3 cloves garlic
1 onion, chopped
3 ribs of celery, chopped
1 sweet red pepper, seeded and chopped
1 fresh  jalapeno pepper, seeded and chopped
2 cans (they are small-maybe a 4 oz size?) of chopped green chiles
2 cans (19 oz each)  of white beans, or 4 cups of cooked white beans.
4-5 cups of unsalted chicken broth
1 lb boneless, skinless chicken thighs, cut into bite sized pieces
1/2 tsp paprika
1 1/2 tbsp cumin
salt and pepper
lime
1 cup whole milk
2 tbsp cornmeal
1/2 cup frozen corn, thawed
Chopped fresh cilantro

In a large saucepan, saute the onion, garlic, celery, red pepper, and fresh jalapeno in a little bit of oil until soft and translucent.  Remove the veggies from the pan and set aside on a plate, briefly.  Make sure you have a little oil in the pan and toss in your cubed chicken thighs. Over medium heat, stir them around until they are browned.  Add the vegetables back into the pan along with the cumin, paprika, a little cayenne if you wish, salt, and pepper, stirring and cooking about a minute or so more to bring out the flavor of the spices.

Pour in about 4 cups of chicken broth, beans, and canned chiles. Give it a good stir and bring to a boil, then turn the heat down and let it simmer for about 30 minutes. In a small bowl, stir together the milk and cornmeal.  Stir into the chili along with the thawed corn,  and continue to heat until warmed through.  If you need more liquid, add the remaining cup of chicken broth. Zest the lime right into the pot, then cut it in half and squeeze the juice in.  Taste and correct for seasonings, adding more salt and pepper if you feel you need it.

Serve topped with fresh cilantro, crushed tortilla chips, and shredded Pepper Jack cheese.

Makes about 6 servings
Read More

Tuesday, December 27, 2011

Bacon Maple Pecan Roasted Chickpeas

Maple Pecan Bacon Roasted Chickpeas


Beans for breakfast? You bet.  This recipe caught my eye when I flipped through Spilling the Beans, and I quickly resolved to make it Christmas morning.  Served with buttery croissants, oranges, and hot cups of coffee, it was delicious.  I also made some a light dinner with a salad a few days later when I discovered the leftovers in the fridge.  Sweet, salty, and so delicious, this recipe makes a decadent snack.

I chose to double the original recipe because I'm a little greedy.

Adapted from Spilling the Beans

One 19 oz can of chick peas, drained and rinsed
6 slices of bacon
1/2 cup maple syrup
2 handfuls of broken pecans

Pre-heat oven to 325 F

On a parchment paper lined baking sheet, roast the chick peas and bacon for 30 minutes, or until bacon starts to brown a bit.  Increase the oven temperature to 400 F.  Add the pecans and stir, then put the pan back into the oven for about 5 minutes more.  Drizzle the maple syrup over all, stirring.  Don't worry if it looks like a lot, it will be tasty. Trust me!

Put the pan back in the oven and let the maple syrup bubble and glaze the bacon, pecans, and chick peas, which should take about 5-8 minutes.  Remove from the oven, stir, and let cool a little before you serve.

Makes about 3 cups
Read More

Friday, November 11, 2011

Braised Chicken Thighs and Beans

braised chicken and beans, spilling the beans, Julie Van Rosendaal, Sue Duncan


While I was at Blissdom Canada, I had the luck of meeting Julie from Dinner with Julie.  (go check out her blog, it's fabulous!)  Soon after, a copy of her cookbook Spilling the Beans arrived in my mailbox, and I've been happily trying a bunch of recipes ever since.  We eat a lot of beans and grains in our house, as it's one of the very few things that everyone in my house will eat!

I highly recommend this book-not only is it beautiful to look at, the food that I've tried so far has been really delicious. My family loved this recipe, and so did I! We did leave out the fried capers for the topping, although they are in my picture.  I didn't mind them so much but nobody else wanted them.  If you'd like to try them, let me know and I can include them below.  I think the recipe would be just as good without them. 

Adapted From Spilling the Beans

2 slices bacon, diced
1 1/4 pounds boneless skinless chicken thighs, trimmed (although recipe calls for bone-in thighs, and you could use them because they are cheaper, boneless would save you time)
1 large onion, sliced
1 large red pepper, sliced thinly
3 garlic cloves, minced
28 ounce can diced tomatoes
1/2 tsp dried oregano
1/2 tsp dried basil
4 cups cooked white beans (or two 19 oz cans, drained and rinsed)
salt and pepper to taste

Using a large pot, fry up the bacon until crisp.  Remove to a paper towel lined plate to drain.  In the same pan, fry up the chicken thighs until they are browned on both sides.  Remove them to plate.  Still using the same pan (because all that stuff on the bottom is GOLD and lots of flavor!), fry up the onions and red pepper over med low-medium heat, scraping up all that goodness from the bottom of the pan.  When the onions are soft, add the garlic and cook just a little longer, about a minute.

Add the tomatoes, oregano, basil, beans, some salt and pepper to taste, then the bacon and nestle the pieces of chicken in.  Bring to a simmer and then turn down the heat, cover, and let it cook away for about 30 minutes.  Make sure to check it now and then, stirring occasionally to keep it from burning.

If you used bone in chicken thighs, when the stew is done and the thighs are cooked through, you then transfer them out of the stew to a plate, allow them to cool so that you can handle them, and pull all the meat off.  Add the meat back to the stew and stir.  If you aren't using bone-in thighs, still pull them out of the stew and shred, but you should have it easier.

Serve the stew over rice or noodles.  I think it would also be great served up in a bowl with hunks of crusty bread and slices of cheese!  Top with fresh shredded basil, if desired.

Serves 6-8
Read More

Thursday, May 26, 2011

Crockpot Pinto Beans and Rice

I've been on a bean kick lately. Chick peas, pinto beans, black beans, kidney beans...I'm buying them canned, dried, in prepared hummus, you name it. I think I love beans so much because they are something that everyone in my family will will eat, plus they are so cheap that they help keep my grocery bill down. I kind of blame Katie, since I sort of mentioned trying dried beans and then she bugged me, and bugged me, and then I felt all sorts of bean guilt like maybe I was missing out on something. Are they really fantastic? Is there some crazy dried bean secret that I don't know?

(Edit: The word bugging doesn't really fit. I meant Katie was so enthusiastic that I was trying them out that she'd ask, and I hadn't gotten to it, so eventually I began to feel guilty that the beans were in my cupboard and I was ignoring them! How could I ignore the awesomeness that is dried beans?!? But no, not bugging. Gentle prodding that made me giggle.)

Well, sort of. They are really tasty. Crazy cheap. And there's no salt added, which is a huge bonus. If you don't buy dried beans, why not? They aren't any more work, and you can just soak, boil them up, and throw them in the freezer. Easy! Not sure? Check out Katie's great post on How to Cook Dried Beans.

This recipe from Merry intrigued me because she's from Alabama, and a recipe from her childhood would be completely different from my own, having grown up in central BC. Beans and rice? What would they be like?

Delicious. Oh, SO delicious. Kevin doesn't even really love baked beans, but he snarfed these down right away, took some for lunch, and declared that they were very, very tasty.

Now, hint about the dried beans. I did this recipe differently than Merry, mostly because I was a little short on time. I put the dried beans in a container and covered them with water, then soaked them overnight. The next day I drained and rinsed them, put them in a pot, then covered them with water again and brought to a boil. Once at a boil, I turned them down and let them simmer for a good long time until they were soft.

I didn't time how long it took. Generally, it was more than an hour, and I just kept puttering in the kitchen and tasting the beans every now and then to see if they were soft. Make sure to taste more than 1 because often, 1 or 2 would be good and then I'd have a 3rd or 4th and they'd be a bit hard. Once they were cooked, I actually didn't have time to make the dish right away so I then put the beans in the freezer. When it was time to make this, I thawed the cooked beans and then tossed them into the crockpot with all the other ingredients, but I only put in 4 cups of water. Even at that, they were a bit soupy and I had to put the beans in a pan and under the broiler to get rid of some of that excess sauce, so when I make it again I'd go the same route and reduce the water to 3 cups. The original recipe had 8 cups of water, which included the cooking time (which would obviously reduce the amount of liquid), but when I made it I didn't read the recipe right through so I had to improvise a little. See Merry's instructions if you aren't sure what to do.

Adapted from Merry With Children


Pinto Beans With Chorizo and Rice


2 cups dried pinto beans
3 cups water
4 slices of bacon
1 onion, diced
1/2 lb kielbasa cut into bite sized pieces (for a spicy version, use Chorizo sausage, chopped)
1 can ranch style or bbq beans
1 (6oz) can of tomato paste
2 Tbsp apple cider vinegar
2 Tbsp sugar
1 tsp salt (you can always add more)
2 tsp garlic powder
2 tsp onion powder
2 tsp ground paprika

Put the beans in a container and cover with about 3 inches or so of water, giving the beans lots of room to swell. Set aside overnight. The next day, drain off the water and rinse the beans. Get a large pot on the stove and bring the water to a boil, then add the beans. Simmer for about 45 minutes to an hour until the beans are tender. Take off the heat and drain.

In a skillet over medium heat, fry up the bacon. When it's cooked through remove to paper towel to drain, and drain off all but about 1 Tbsp of the bacon fat. Add in the onions and continue to saute them, stirring, until they are translucent and soft.

Put all the ingredients in your crockpot-everything from the beans to bacon, sauteed onions, spices, you name it. Give it all a stir so that it's mixed, then simmer it all on low in your crockpot for 8-10 hours, adding more water if it seems to be a bit dry. I don't like my beans too soupy, so I preferred less water. You may add more if you think you need it.

We served this with a bottle of hot sauce and some steamed rice at the table, and everyone just ate it right up!

Serves 6
Read More

Wednesday, September 8, 2010

South Dakota 4th of July Bison Baked Beans

South Dakota Bison Baked Beans


These baked beans have a story to them. When we were on Food Revolution Road trip, we stopped in Custer, South Dakota and visited the Scotts at their Rock Shop. Last year we had gone on a tour with them, and were hoping to go again.

Only this year, they weren't doing tours. We were so disappointed, but then we were invited to join them for Custer's Fourth of July fireworks that evening. When we arrived, there was a BBQ in full swing, and we tasted some of the BEST baked beans we'd ever had. I managed to get a bit of the ingredients from the lovely lady who made them, and then I had to improvise on my own. The result? Delicious! I may tweak it more and add some molasses instead of all that brown sugar next time, but it was still yummy.

An original recipe by Karen Humphrey

1 lb ground bison
10 pieces of bacon, cooked until crisp and crumbled
19 oz can kidney beans, drained
19 oz can chick peas, drained
19 oz can black beans, drained
19 oz can mixed beans, drained
19 oz can baked beans (like Hunts, or Heinz)
14 oz can stewed tomatoes
1 onion, chopped
1 head of garlic, chopped
1 1/3 cups ketchup
3/4 cup brown sugar
1/2 cup red wine vinegar
2 tbsp dijon mustard

Pre-heat oven to 350 F.

In a pan over medium heat, saute the garlic and onion in a bit of olive oil until they are translucent and soft. Add the bison meat and continue to saute away, cooking until the meat is cooked through and no longer pink.

Mix all the beans, the cooked buffalo meat mixture, bacon, and stewed tomatoes together in a large bowl. Set aside.

In a medium bowl, whisk together the ketchup, brown sugar, red wine vinegar, and mustard. Pour over the beans and toss.

Pour it all into a large baking dish, cover with tin foil, and bake for 1 hour. Makes a LOT of baked beans-probably enough for 8 people as a side.

When you re-heat them, add a bit of water to loosen it all up again and make it 'saucy'.

Delicious!
Read More

Friday, April 9, 2010

Jamie Oliver's Mexican Bean Wraps


So, the week got away from me and before I knew it, Friday was staring me in the face. Friday?!? Already? Actually as I'm writing this, Friday is almost over here on the West Coast.

This week I decided to try Jamie Oliver's Mexican Bean wraps. I believe they were the same wraps that he made for the kids at the Huntington Elementary school in that last, do or die meal before they finally allowed him to stay longer.

Good one, Jamie! They were really good!

I admit, Jamie's recipes have a few techniques that make me stop and scratch my head. I mean..make up what looks like a fairly bland mixture of beans and onions, and then puree half of it? What's that all about? It all comes down to trust. Okay, he's the chef, I'm going to try it.

Every time, every single time so far, I wonder why I bothered questioning at all. Why? They were yummy! Not just that, but both Jake and I took them in our lunches the next day and they were equally as delicious. I did change things up a bit and added more chili powder, some fresh cilantro, and slathered them with our favorite salsa. I know, I know..I just can't leave well enough alone.

These are SO MUCH better than canned re-fried beans. I can't even BEGIN to tell you. Don't even bother with canned, re-fried, loaded with salt (and look like dog food) beans. These are SO cheap, and so easy to make, your kids could make them FOR you.

Adapted from Jamie Oliver

1 onion, peeled and sliced
1 clove of garlic, peeled and crushed (I minced it)
a pinch of chili powder (I um...used about a tsp-we wanted a bit of spice!)
1 tsp tomato puree (I used tomato paste)
480 g of tinned kidney beans, drained and rinsed (I used a scale and weighed them. Turns out about two 14 oz cans?)
150 g of tinned tomatoes (again, I used a scale. It wasn't much, actually)
salt and pepper
1/2 green pepper (I used yellow)
1/2 red pepper
5 large flour tortillas (I used whole wheat)
150 g cheese ( I didn't even measure...lolol!)

With a bit of oil in your fry pan, saute up the onion and garlic until it's nice and soft. Add the chili powder. Stir it around, then add in the kidney beans, tomato puree, and canned tomatoes. Add salt and pepper to taste, and cook until the juice from the tomatoes is cooked off.

Remove from the heat and set aside. Scoop half of the bean mixture out of the pan and put it in your food processor. What, you ask? Really. I'm serious. Process 1/2 of the bean filling until it's a paste.

Saute up your peppers a bit so that they are soft-ish too. Add them to the other half that you didn't process-the chunky beans and bits of onion, etc. Stir.

Lay 5 flour tortillas out on the counter, and divide the pureed bean paste between them. Spread the pureed beans on the tortillas. Top with the chunky bean/pepper mixture. I added a sprinkle of fresh cilantro, and then topped each with some cheese. Roll them up and place in a greased baking dish.

Bake them for about 20 minutes at 400 F until hot, browned, and delicious. Serve topped with salsa and a sprinkle of cheese.

Makes 5 wraps.
Read More

Tuesday, March 16, 2010

Chick Pea Curry


Awhile ago someone in my staff room had some really amazing looking Indian food for lunch. I sat there, watching her eat, thinking that I really wanted to get some of that deliciousness for myself. As soon as I got home, I was on the Internets looking up recipes.

These ones for Chick pea curry and Indian spiced cauliflower and potatoes were from Smitten Kitchen. I don't have permission to write the recipe here, so you will have to click on over there to get a good look at how to make it. I can tell you they were amazingly good and I would have served it with rice, but I was completely out. (I know. How could I be out of rice, of all things?) I did manage to pick up some naan bread from the store, which went with it very nicely.

The recipes were really easy to make, and I highly recommend them. Spicy, but not too spicy.
Just delicious.
Read More

Wednesday, February 18, 2009

Karen's Black Bean Salsa Burritoes

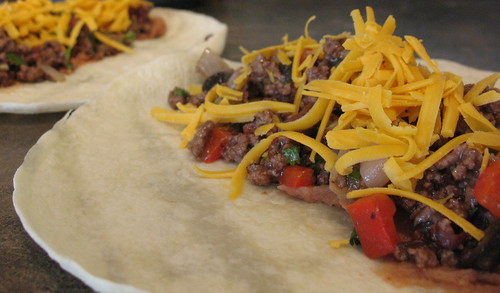
I have tried many burrito recipes, but none seemed to be perfect, until I came up with this one. Newman's Own Black Bean and Corn salsa is perfectly seasoned, with a fantastic smoky flavor that just makes these burritos go from ho-hum to amazing! They also make a great freezer meal, or lunch box item. Defrost until the centers are no longer hard, and then bake at 350 F for about 15 minutes.

Black Bean Salsa Burritos


1 1/2 lbs lean ground beef
1 onion, sliced
1 sweet red pepper, sliced
one 500 ml (approx) jar of Newman's Own Black Bean and Corn Salsa
1 small can sliced black olives (about 1/4 cup)
1/3 cup chopped fresh coriander
1 lime
two 398 ml cans refried beans
2 1/2 cups of aged cheddar (you can also try pepper jack)
2 packages of burrito sized (10 inch?) flour tortillas (about 16)

Brown the beef, onion, and sweet pepper with a bit a oil in a skillet until the beef is brown, no longer pink, and cooked through. Remove from skillet to a bowl. Add olives and stir in entire jar of salsa.

Taste and adjust your seasonings. I think it's good just the way it is, but you can add more spice if you like. Add coriander, cut the lime in 1/2 and squeeze the juice over top, and stir.

Lay the tortillas out on the counter. In the middle of each one, smear about 3 tbsp refried beans, then top with 2 1/2-3 heaping tbsps of the beef mixture, and a sprinkle of cheese. Continue until you have divided the fillings among all the tortillas. Roll them up by following these directions (for the rolling, not the filling)

Place your burritoes seam side down in a baking dish and heat up for about 10-15 minutes at 350 F. Or, you can wrap them in plastic wrap and then tin foil, and put them in the freezer for another day!
Read More
© 2005-2017 all written and photographic content by Scattered Mom/Karen Humphrey (unless otherwise specified) and may not be reproduced or used in any manner without consent. All rights reserved.

© 2014 Chasing Tomatoes, AllRightsReserved.

Designed by ScreenWritersArena